Category: Uncategorized

  • When Should You Replace Your Surfboard? 4 Signs You Need an Upgrade

    When Should You Replace Your Surfboard? 4 Signs You Need an Upgrade

    When Should You Replace Your Surfboard? Signs Your Board is Holding You Back

    Knowing when to replace your surfboard is one of those things you don’t really understand until you’ve felt the difference between a board that’s alive… and one that’s just done.

    Whether it’s because the board is physically falling apart or because your skills have moved past what the board can offer, riding the wrong craft is the fastest way to kill your progression. If you’re wondering if your current setup is the problem, you’ve likely already hit the “Progression Wall.”

    Before you pull the trigger on a new purchase, make sure you’ve checked our Surfboard Volume Explained Guide to ensure your next move is the right one. Otherwise, here is how to tell if it’s time to say goodbye to your current board.

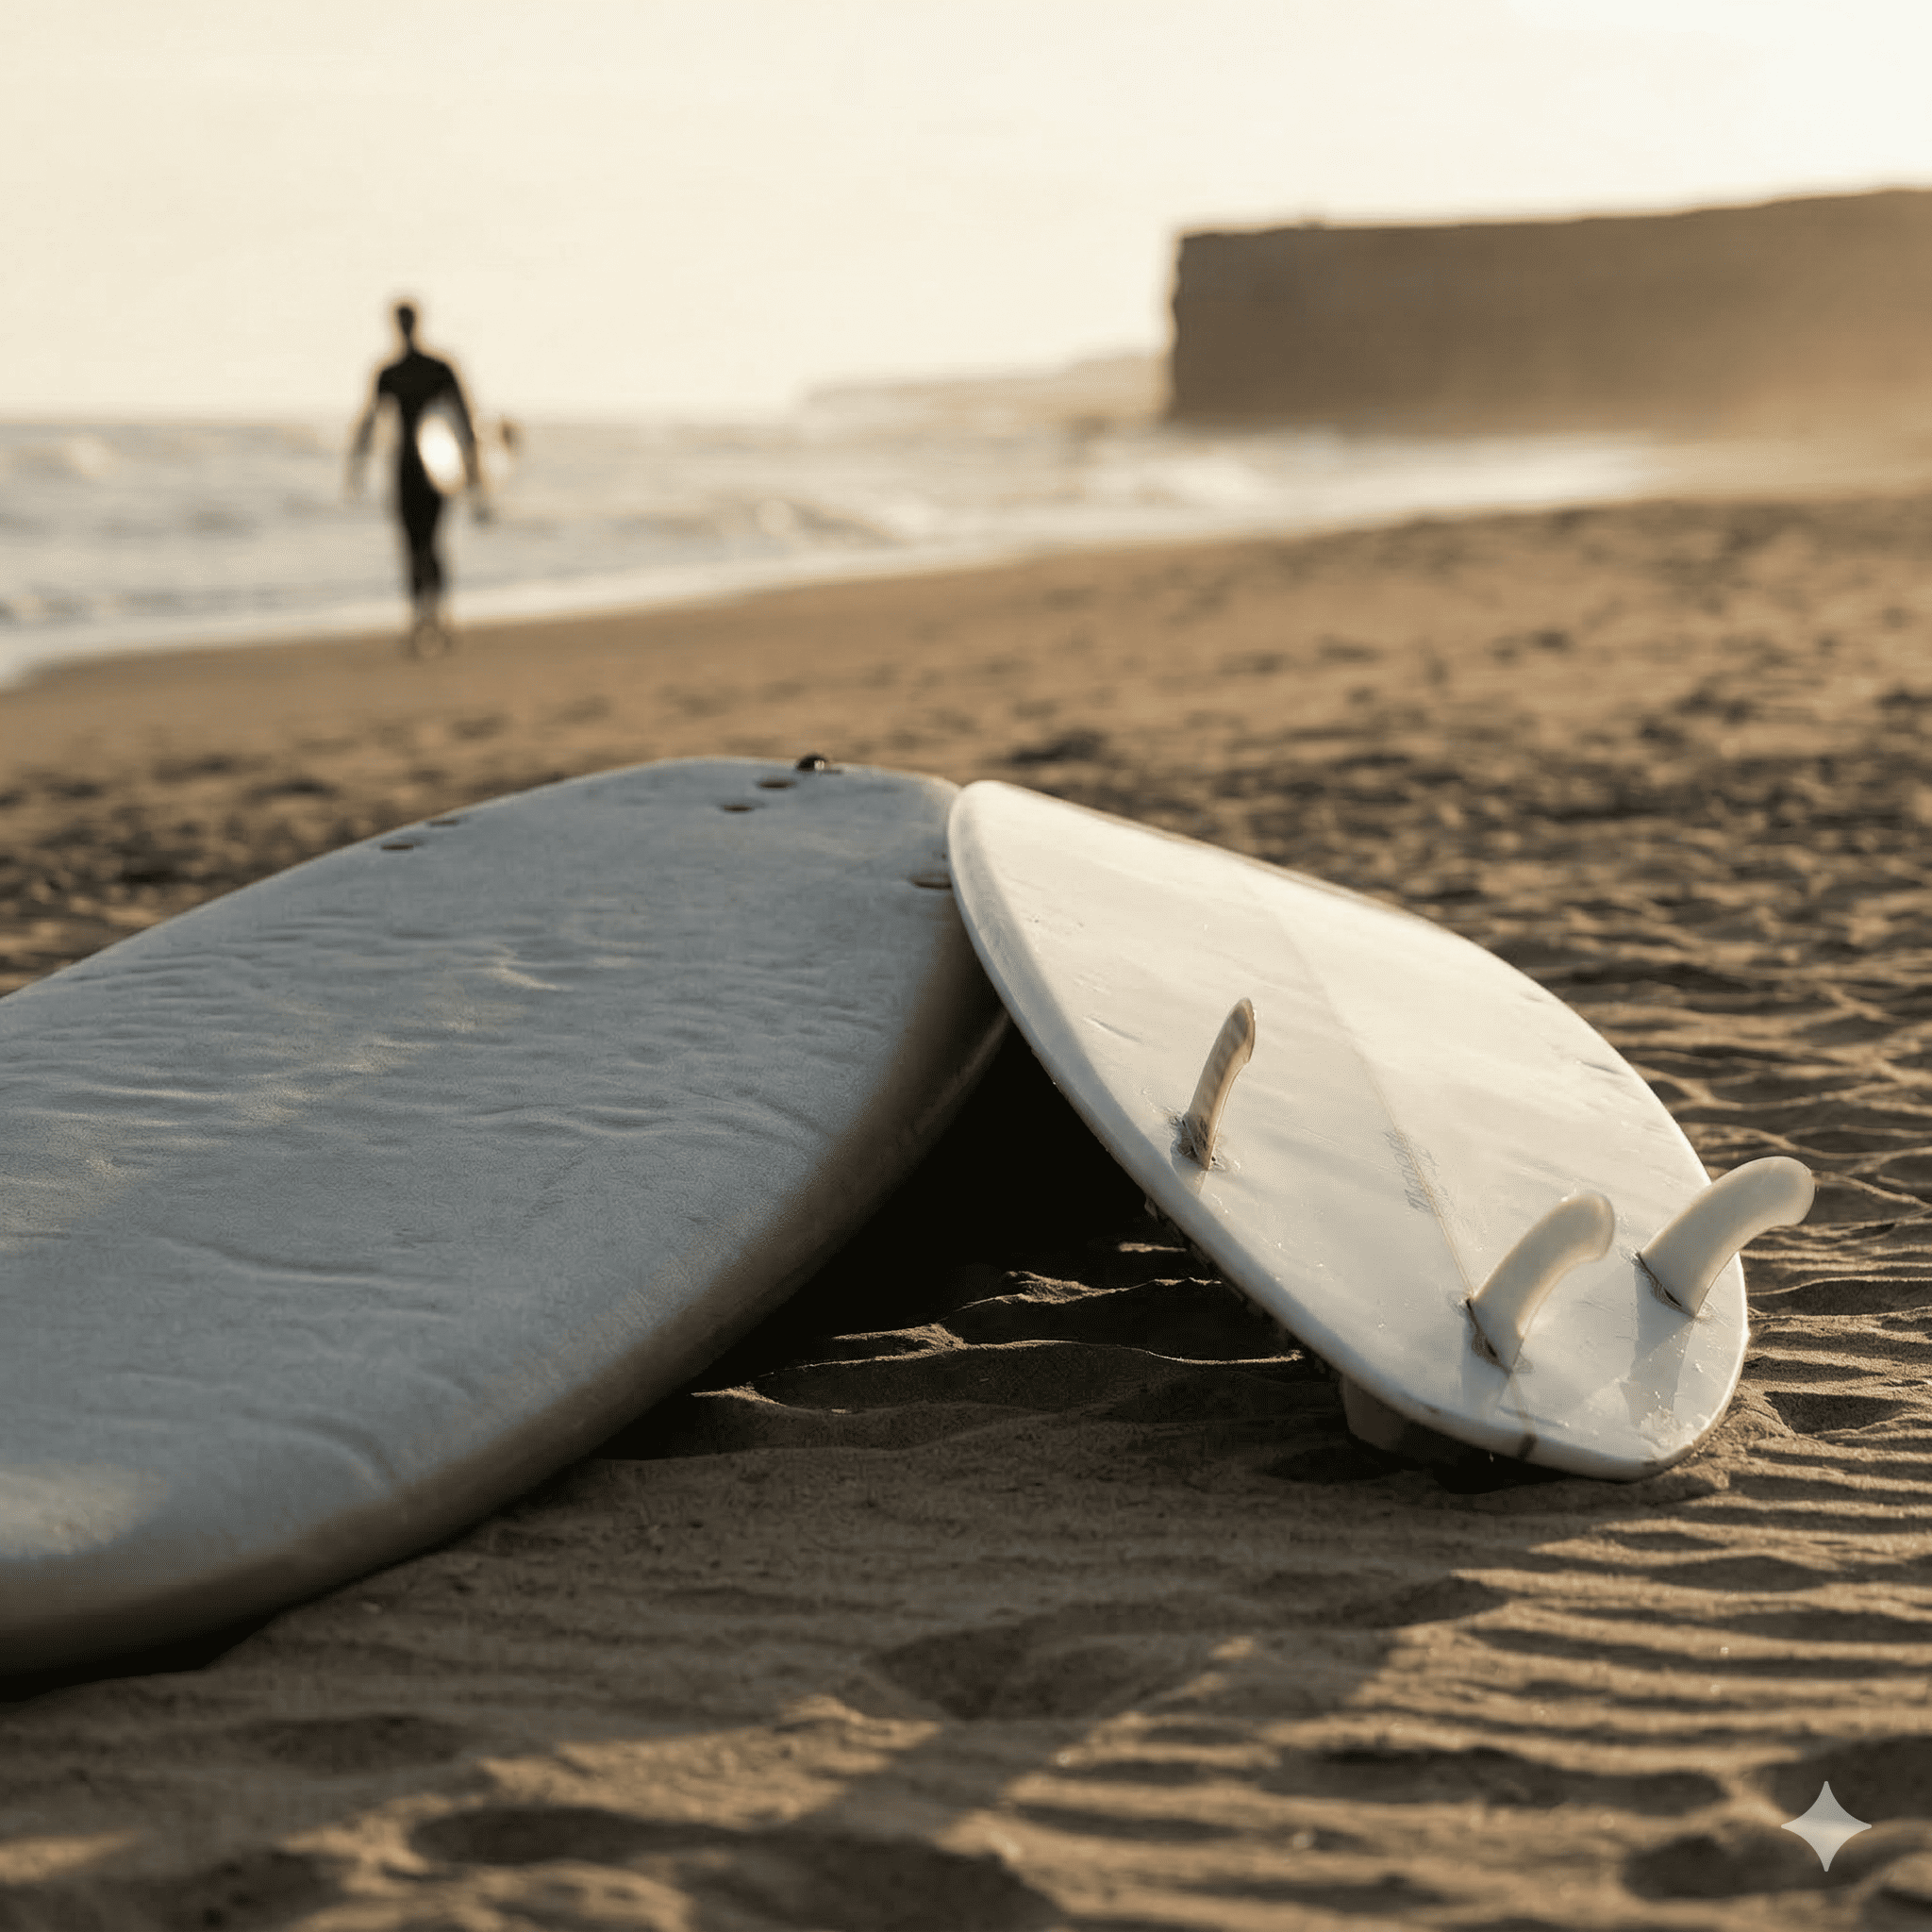
    The “Dead Board” Syndrome: Has Your Board Lost Its Soul?

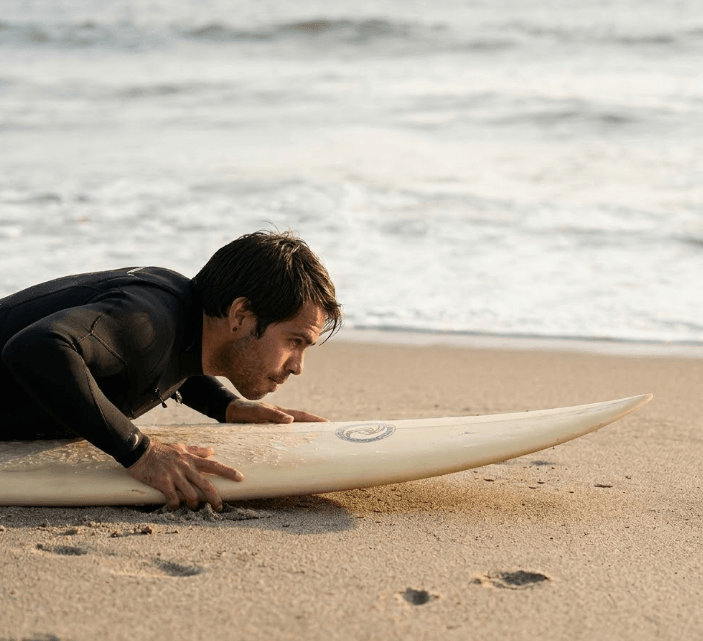
    I’ve definitely ridden boards that looked fine on the outside but felt completely dead under my feet. There was no spark, no response, and absolutely no “pop” when trying to push through a turn.

    At first, I thought it was just me having a bad session. But then you hop on a fresher board and it’s like everything wakes up again. Surfing isn’t just about foam; it’s about flex.

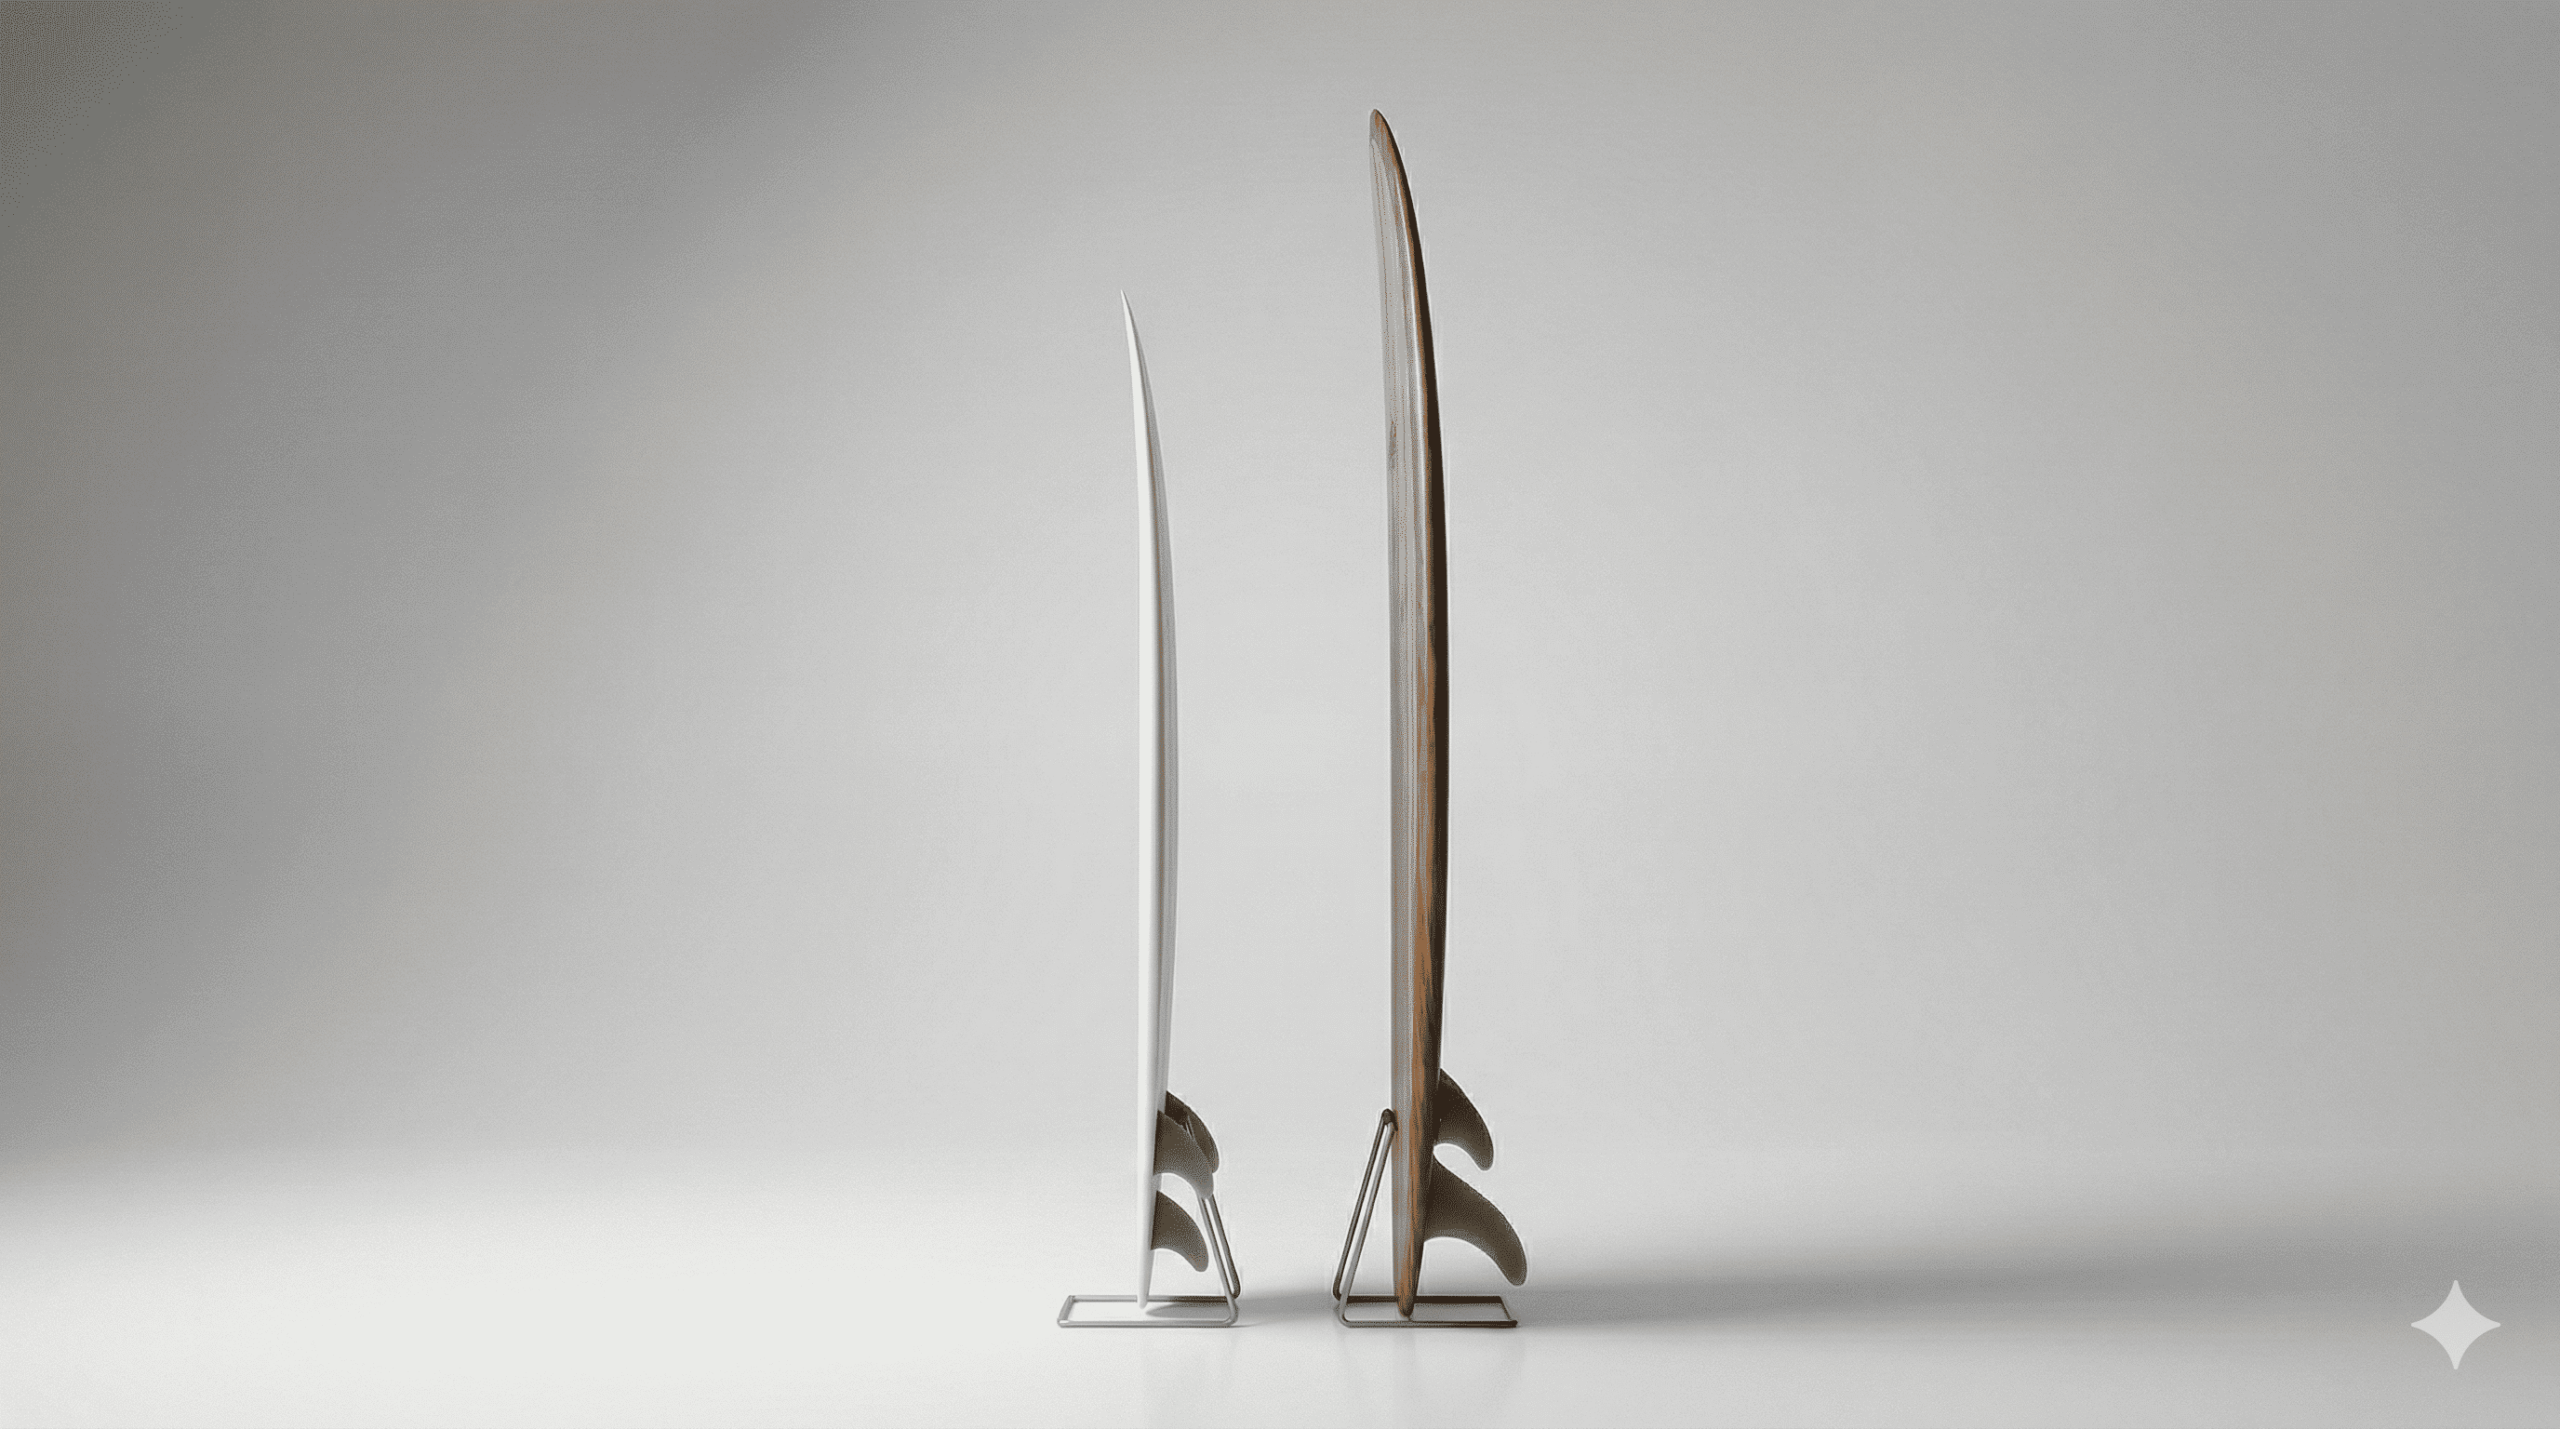
    Loss of Pop and Flex: The Silent Killer

    Surfboards are designed to act like a spring. When you push into a turn, the board flexes and then “snaps” back, projecting you forward with speed. Over years of use, the fiberglass and foam lose that elastic memory. The board becomes “soft.” If you find yourself struggling to generate speed on waves that used to feel fast, your board might have simply lost its life.

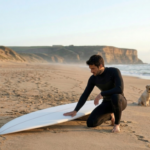
    Yellowing and Waterlogging

    If your board has turned a deep shade of yellow or feels significantly heavier than the day you bought it, it’s likely waterlogged. Even “watertight” boards take on microscopic amounts of moisture over time through pressure dings and old repairs. A heavy, water-saturated board sinks lower in the water, paddles slower, and loses the buoyancy you need to stay on top of the wave.

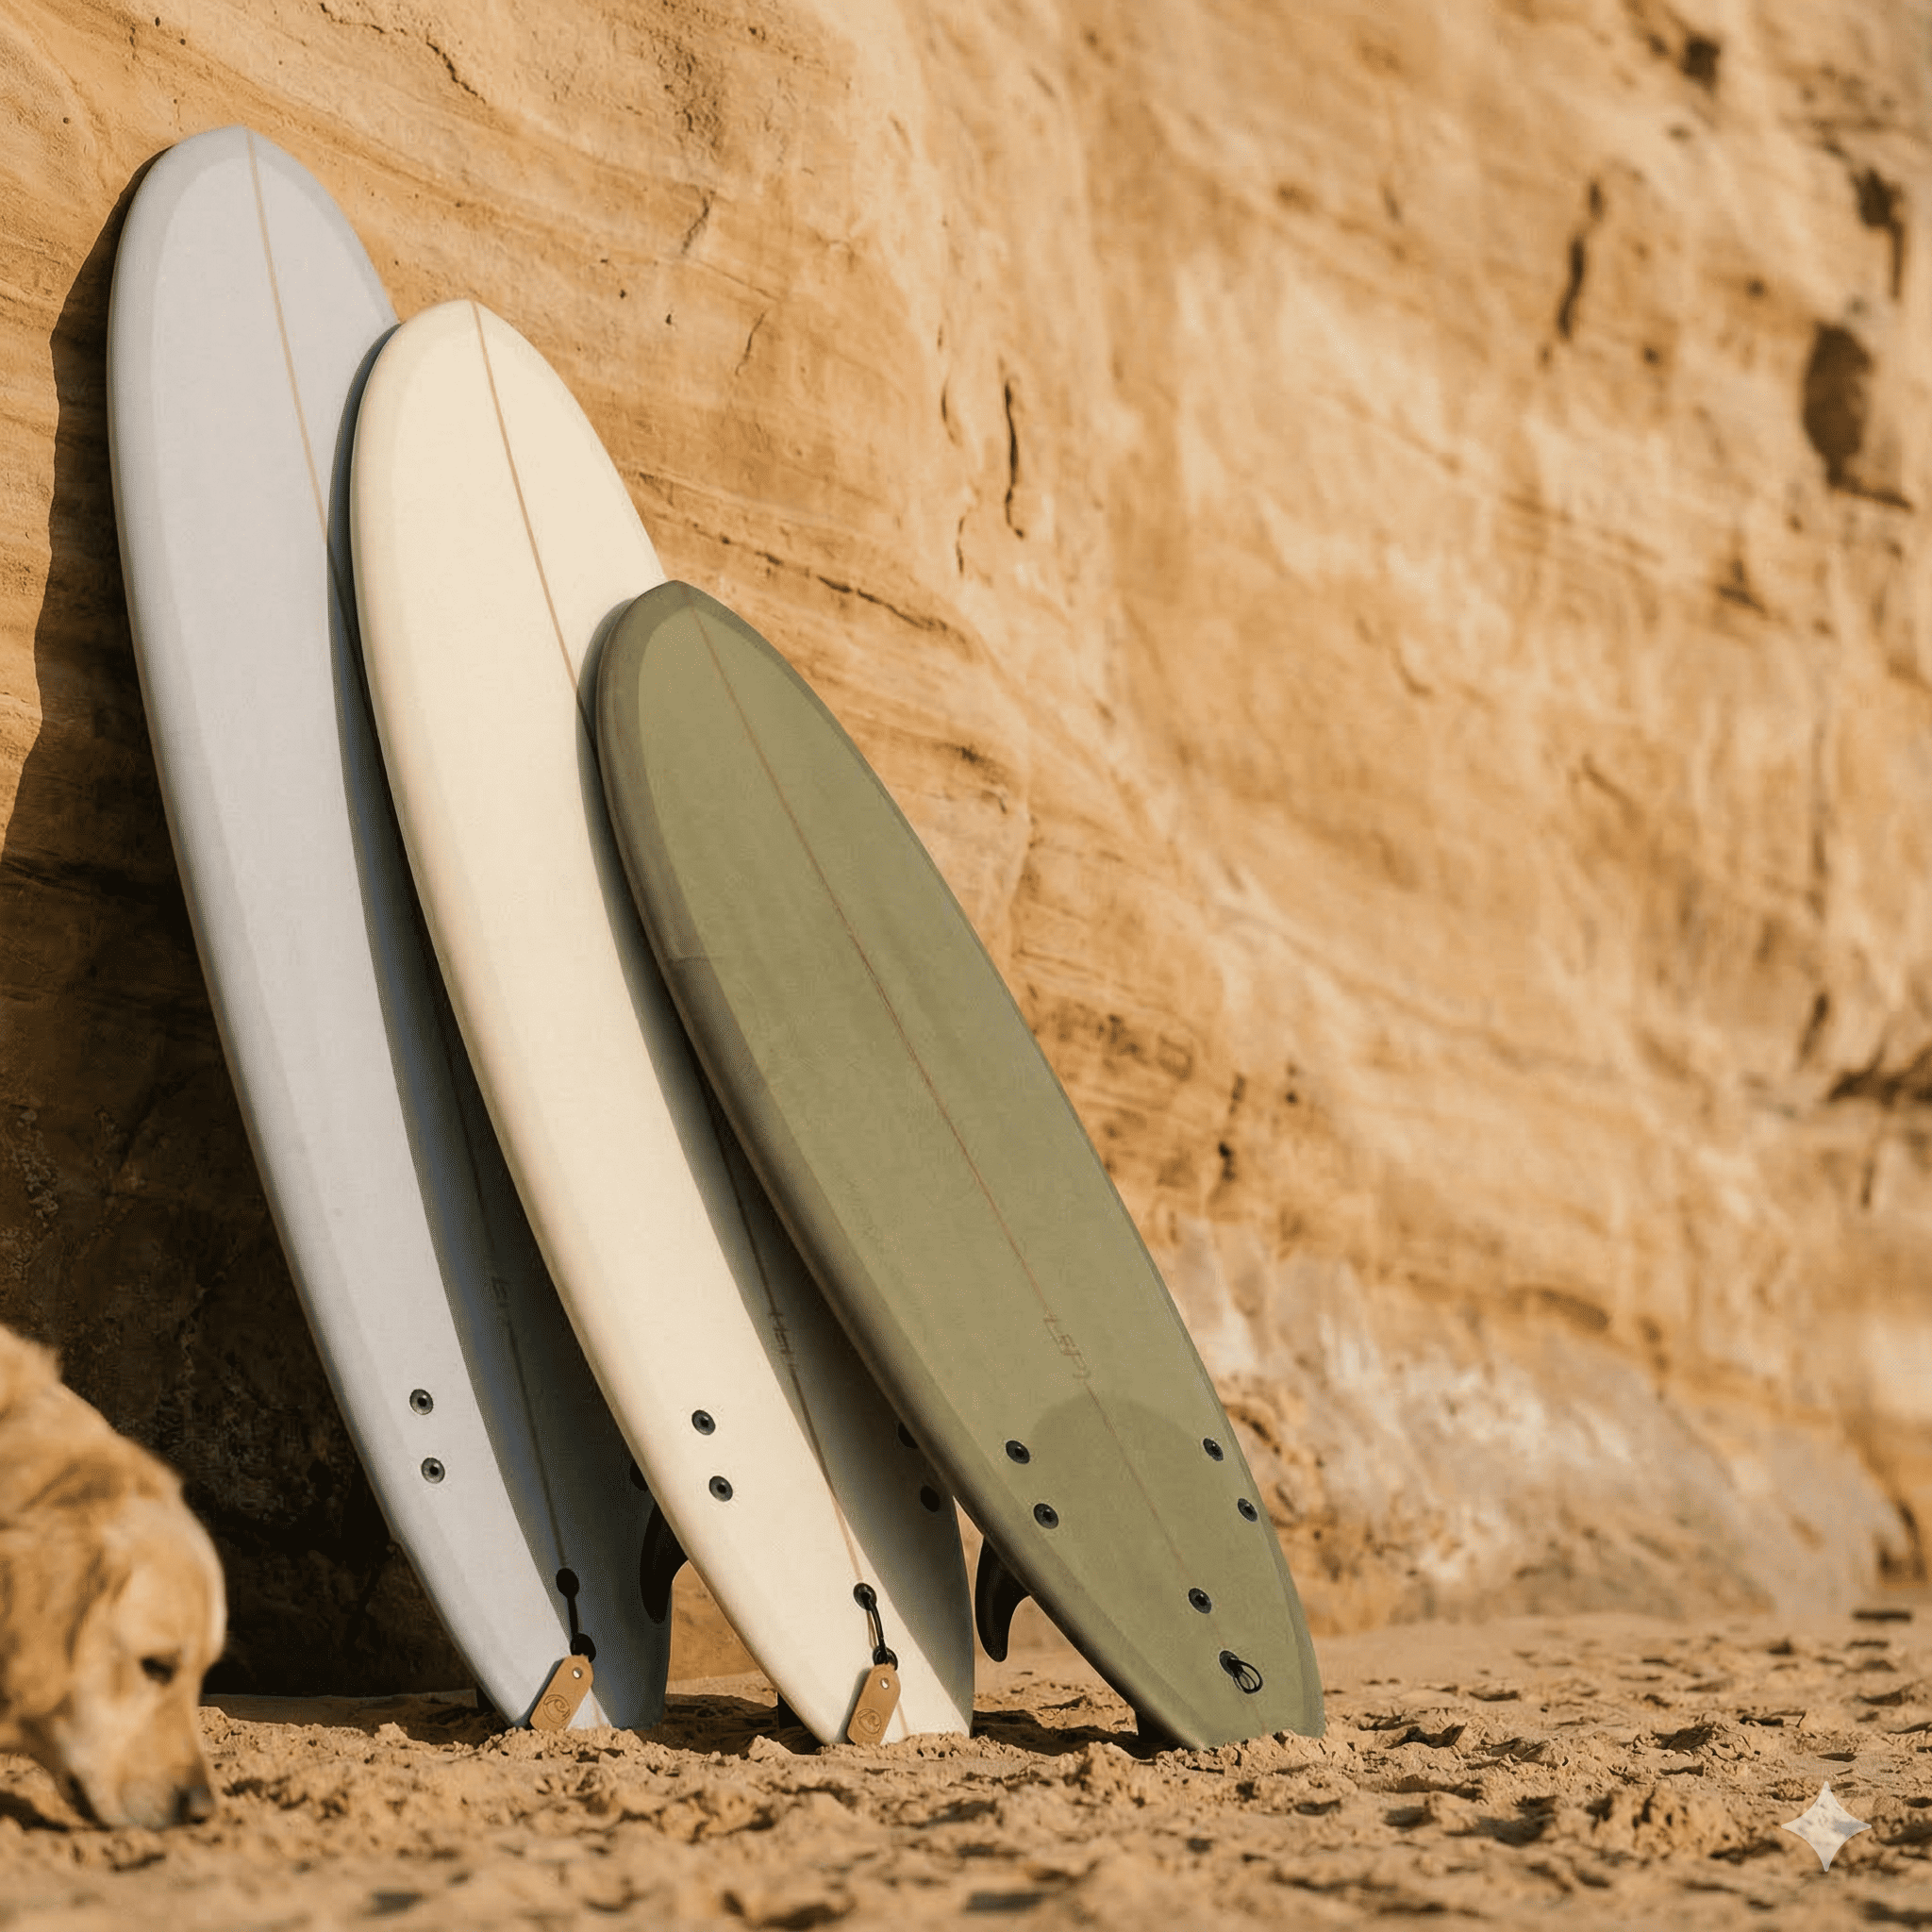
    The Progression Wall: When You’ve Outgrown the Shape

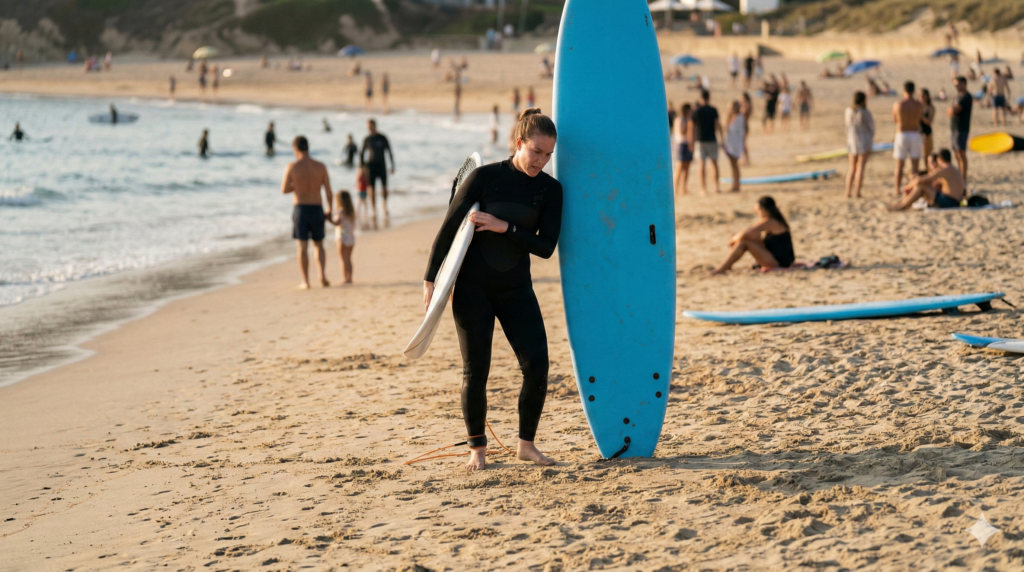
    Sometimes the board is in perfect condition, but you are the one who has changed. I stayed on certain boards (especially bigger funboards and foamies) way longer than I should have.

    At the beginning, a big board is your best friend. It’s stable and helps you build confidence. But eventually, you reach a point where you stop struggling to stand up and start wanting more from the wave. Signs you’ve outgrown your board:

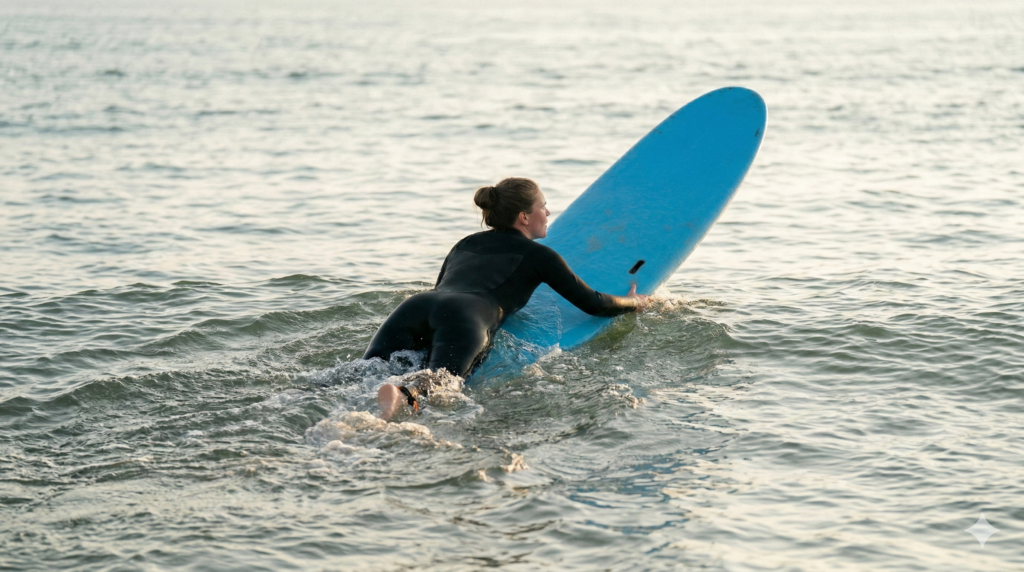
    • You feel like the board is “slow” to react when you try to turn.
    • The board feels “clunky” when you’re trying to trim across the face of the wave.
    • You’re catching every wave easily but feel “stuck” in a straight line.

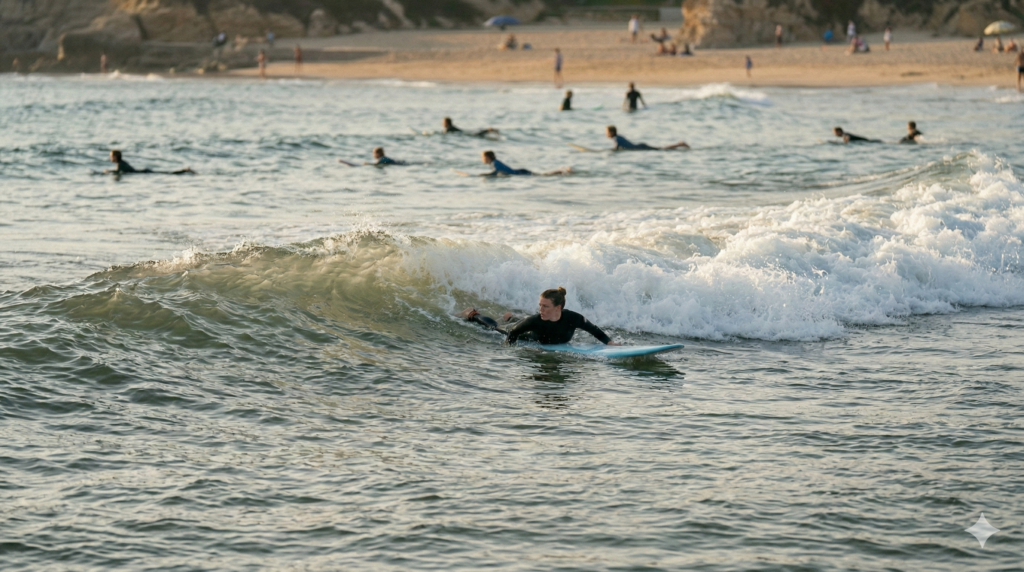
    If you change boards too early, you’ll slow your progression down by falling more. But if you change too late, you’ll plateau. When the board starts feeling like a hurdle rather than a tool, it’s time to downsize or look for a more refined shape.

    When Should You Replace Your Surfboard? Learn the signs of a "dead" surfboard, how to spot waterlogging, and when it’s time to move past your beginner board.

    The “New vs. Used” Debate: A Strategic Approach

    When it’s time for an upgrade, don’t feel pressured to buy a brand-new, sparkling white board off the rack. While that fresh “pro” feel is amazing, a brand-new board comes with a higher price and, honestly, a bit of psychological pressure.

    The First Ding Syndrome: We’ve all been there,the first ding on a $800 board hurts way more than it should. That stress can actually make you surf more tentatively.

    Why Lightly Used is Often Smarter

    For a progressing surfer, a lightly used board is often the smartest move. You can get a high-quality, name-brand board for a fraction of the cost.

    What to look for: Avoid boards with “soft spots” (where the fiberglass feels squishy) or major repairs around the fin boxes.

    What’s okay: Minor cosmetic marks or “pressure dings” (slight heel dents) on the deck are totally fine and won’t affect performance.

    A used board allows you to push yourself harder because you aren’t terrified of a little scratch. It’s about the connection and the possibility, not the price tag.

    The Surfboard Retirement Checklist

    SignalDiagnosisAction
    Heavy/YellowedWaterlogged foam core.Replace. It’s a literal anchor now.
    Cracks in Fin BoxesStructural failure at a stress point.Repair if high-end; Replace if entry-level.
    Dead” feeling/No speedLoss of fiberglass flex/memory.Replace. You can’t fix “dead” foam.
    Catching waves is “Too Easy”Outgrown the volume/length.Upgrade. Move to a smaller, more responsive shape

    Trust the Feeling

    At the end of the day, replacing your board isn’t just about damage or age, it’s about your relationship with the ocean. If the board feels dead, if it’s not responding to your input, or if you’ve clearly hit a wall in your turns, it’s time to move on.

    When you step onto the right “next” board, you’ll feel it immediately. More life, more response, and a sudden realization of what you’ve been missing. Trust that feeling.

    Frequently Asked Questions

    How long does an average surfboard last?

    For a casual surfer, a well-maintained PU (polyurethane) board usually lasts 3 to 5 years before it loses its “pop.” Epoxy boards tend to stay “fresh” a bit longer due to the nature of the resin.

    Can I fix a waterlogged board?

    Not really. You can dry it out and seal the leaks, but once the foam has absorbed a significant amount of water, the internal cells are damaged. It will never have the same buoyancy or flex again.

    Is it worth repairing a snapped board?

    Only if it’s a high-value or sentimental board. A snapped board will always have a “dead spot” where the repair was made, and the weight distribution will be permanently altered.

  • Surfboard Volume Explained: Why Liters Are Only Half the Story

    Surfboard Volume Explained: Why Liters Are Only Half the Story

    Surfboard volume is one of those topics that sounds incredibly technical, but once you’ve been in the water long enough, you realize it’s both vital and a little overhyped at the same time.

    If you’ve spent any time in a lineup, you’ve probably heard surfers arguing over one or two liters of volume like it’s life or death. They talk about numbers like they’re tuning a race car, saying things like, “This board is 31.5 liters, but I usually ride 30.8,” as if that tiny difference is the magic key to a perfect session.

    While those small adjustments matter for pros, for most of us, volume is a guide—not a guarantee. Before you get lost in the math, make sure you understand the basics in our How to Choose Surfboard Size Guide. If you’re ready to look past the numbers, here is the truth about surfboard volume.

    The “Surfboard Volume Lie”: Why Identical Liters Feel Different

    I’ve owned two boards with almost identical volume (same liters, similar length) where one felt like a dream and the other felt like a brick. One was alive, responsive, and easy to paddle; the other was slow, awkward, and impossible to position.

    This is what I call the Volume Lie. Volume tells you how much a board floats, but it doesn’t tell you how it will feel under your feet or under your chest when you’re paddling.

    Two boards can carry the exact same 35 liters, but the way that foam is distributed,through the nose, under your chest, or in the rails, changes everything. If the foam is concentrated under your chest, the board will glide into waves effortlessly. If it’s shoved into chunky rails or an oversized tail, it might feel “corky” and difficult to control. Volume is just a measurement of displacement; distribution is what dictates performance.

    Surface Volume

    The Magic of “Hidden Volume”

    We’ve all seen those boards,the ones that look sleek, thin, and high-performance, yet they stay high on the water and catch everything. This is “Hidden Volume”.

    Smart shapers know how to hide foam where you actually need it (usually under the chest for paddling) while keeping the rails tapered and the nose refined. It’s the ultimate “cheat code” for surfers who want a board that looks like a sports car but paddles like an SUV. It’s not just about cramming foam into a board; it’s about placing it where it actually helps you stay stable and get into waves early.

    Volume Distribution: How Foam Affects the Ride

    Foam PlacementThe FeelingBest ForThe Drawback
    Under the Chest “The Paddle Hack”Catching waves early and easy gliding.Can make the front of the board feel “heavy” in turns.
    In the Rails“The Safety Net”Extra stability and forgiveness during turns.Thick rails are harder to “sink” into the wave face for grip.
    In the Tail“The Turbo”Maintains speed through flat or weak sections.Can make the board feel “bouncy” in powerful surf.

    Beyond the Number: Rocker, Rails, and Outline

    When I hear people obsessing over a one-liter difference, I realize they might be missing the bigger picture. Volume is a great starting point to ensure you aren’t sinking, but it’s heavily influenced by other factors:

    1. Rocker: A board with a lot of curve (rocker) pushes more water and can feel like it has “less” volume when paddling than a flat board.
    2. Outline: A wide, round nose adds a level of stability that liters alone can’t describe.
    3. Fitness: A pro might ride 28 liters because their technique is perfect, but a beginner might need 80 liters to achieve the same result.

    The Bottom Line

    The best board I’ve ever ridden wasn’t the one with the “perfect” volume number on the stringer. It was the one that felt right in the water, easy paddle, smooth takeoff, and responsive when I needed it.

    Until you get a board in the ocean and feel how it moves, volume is just a number. Use it to find your “safety margin,” but don’t let a decimal point talk you out of a board that feels like magic.

    Frequently Asked Questions

    What exactly is surfboard volume?

    Volume is a measurement (typically in liters) of the total amount of space the interior of a surfboard occupies. It is calculated by multiplying length, width, and thickness, adjusted for the board’s specific shape and curves.

    Why do beginners need high-volume boards?

    Beginners need high volume because it provides maximum buoyancy. This keeps the board high on the water, making it significantly easier to paddle, catch waves, and maintain balance during the pop-up.

    Can a board have too much volume?

    Yes. If a board has too much volume for your weight or the wave conditions, it can feel “corky” or bouncy. This makes it difficult to engage the rails of the board in the water to make a turn, especially in larger or more powerful waves.

  • How to Choose Surfboard Size: Why the Charts are Usually Wrong

    How to Choose Surfboard Size: Why the Charts are Usually Wrong

    Surfboard size is one of those things that looks incredibly straightforward on paper and then completely falls apart in real life. If you search for a size chart, you’ll find plenty of tables telling you exactly how many liters of volume you need based on your weight.

    I once followed those charts to the letter. I bought a board that was technically “perfect” for my weight—the liters matched, the length made sense, and the chart said it was my ideal match. Then I took it out and couldn’t catch a single wave. I was paddling my heart out and missing everything, or catching waves so late that I got dropped instantly.

    That was a frustrating, expensive lesson: charts don’t account for your actual skill level, your paddling fitness, or the margin of error you need to actually succeed. Before you buy, make sure you’ve read our How to Choose the Right Surfboard Guide to understand the basics. If you’re ready to find your specific size, here is how to avoid the “perfect on paper” disaster.

    The “Perfect on Paper” Disaster

    The biggest mistake beginners make with size charts is treating them like strict rules instead of rough guidelines. Most online charts lean toward advanced surfers who already have elite paddling technique and perfect timing.

    When I stopped trying to match numbers and started paying attention to feel, everything changed. I had my “Goldilocks” moment when I picked up a board that was significantly bigger than what the charts suggested for my weight. It had more volume, more width, and more length.

    From the first paddle, it just clicked. I could glide into waves earlier, I had time to think during my pop-up, and I wasn’t fighting just to stay balanced. Everything slowed down in the best way possible. The right size isn’t about being technically “correct” according to a math formula; it’s about giving yourself enough of a safety margin to actually catch waves.

    Volume vs. Dimensions: Why Length and Width Matter

    While everyone talks about “liters” (volume), the actual dimensions—length, width, and thickness—dictate how stable that volume feels. A 40-liter shortboard and a 40-liter funboard will feel completely different in the water.

    For beginners, width is your best friend. A wider board provides a more stable platform for your pop-up, preventing the “wobble” that causes so many falls. Similarly, extra length helps with “glide,” allowing the board to start moving before the wave even reaches you.

    Real-World Sizing Guide: The “Safety Margin” Table

    This table is designed for beginners and early intermediates. It adds a “safety margin” of volume to ensure you actually catch waves rather than sinking.

    Your WeightRecommended Volume (Beginner)Recommended Board LengthWhy This Size?
    50–60 kg60–70 Liters7’6″ – 8’0″Provides maximum float for lighter frames without being too heavy to carry.
    60–75 kg 70–85 Liters8’0″ – 8’6″The “Goldilocks” zone for most adults; high stability and easy paddling.
    75–90 kg85–100+ Liters8’6″ – 9’4″Essential for maintaining buoyancy and catching waves in smaller surf.
    90 kg+100+ Liters9’6″+ Large longboards or “Super-Foamies” are required to keep you high on the water.

    The 3 Biggest Sizing Mistakes (And How to Fix Them)

    1) The Ego Trap: Sizing Down Too Early

    Many beginners want to move to a smaller board because they think it makes them look more experienced. The irony is that you look like a much better surfer when you are actually standing up and riding a wave on a big board, rather than struggling and sinking on a tiny one.

    2) Ignoring Your Local Wave Conditions

    If you mostly surf small, “mushy” waves, you need a bigger board regardless of what the weight chart says. Larger boards carry momentum through weak sections of water where smaller boards would simply bog down and stop.

    3) Treating Volume as a Strict Rule

    If you are struggling to paddle, constantly missing waves, or feeling off-balance, your board is too small for where you are right now. Don’t be afraid to go 5 or 10 liters above what the “pros” suggest. More waves lead to more practice, and more practice leads to faster progression.

    Finding Your “Goldilocks” Board

    The goal in the beginning isn’t high-performance maneuvers; it’s giving yourself the best possible chance to actually surf. When the board size is right, you feel it immediately. It should feel manageable, not like a constant battle.

    If you are looking for specific recommendations that fit these size profiles, check out our guide to the Best Surfboards for Beginners in 2026. Stop chasing the “perfect” number and start chasing the board that actually lets you stand up.

    Frequently Asked Questions

    Can a surfboard be too big for a beginner?

    Pile of diferent types of surboard

    While it’s rare, a board can be too big if you physically cannot carry it to the water or if it is so wide that you cannot reach your arms around it to paddle effectively. However, 99% of beginners struggle because their board is too small, not too large

    How do I know if my surfboard has enough volume?

    When you are lying on the board in neutral water, your chest should be well above the surface, and the nose of the board should not be underwater. If the board is sinking significantly while you are just floating, you need more volume.

    Does my height matter as much as my weight for board size?

    Two surfet on a surfer store choosing a surfboard

    Weight is the primary factor for buoyancy (volume), but height matters for stability. Taller surfers have a higher center of gravity, meaning they often need a wider board to help them maintain balance during the pop-up and while riding the wave.

  • Soft Top vs. Hard Top Surfboards: The Humbling Truth About Transitioning

    Soft Top vs. Hard Top Surfboards: The Humbling Truth About Transitioning

    The jump from a soft top to a hardboard is one of those moments in surfing you never forget—mostly because it humbles you instantly.

    For months, you’ve been the king of the foamie. You’re catching waves, standing up consistently, and feeling like a “real” surfer. Then, you paddle out on a fiberglass or epoxy hardboard for the first time, and suddenly, you feel like a day-one beginner all over again.

    What I learned the hard way is that moving to a hardboard isn’t just an upgrade in equipment; it’s a complete recalibration of your muscle memory. Before you make the switch, make sure you’ve mastered the basics in our How to Choose the Right Surfboard Guide

    If you are ready for the challenge, here is the honest truth about the transition from foam to fiberglass.

    The First Paddle: Why a Hardboard Feels “Alive” (and Unstable)

    The first time I paddled a hardboard, the difference was immediate. It felt faster—no doubt about it. The board had more glide, cutting through the water instead of dragging over it. When I caught a wave, the board responded way quicker to every shift in my weight.

    But there was a catch: it felt incredibly unstable.

    On a soft top, you can be a bit sloppy with your balance and still stay on your feet. The foam deck acts like a stable platform that forgives your mistakes. On a hardboard, that safety net is gone. Every little error in your positioning or pop-up shows up instantly. It stops feeling like a platform and starts feeling like something alive under your feet. You have to be precise, or it will buck you off.

    Goodbye Safety Net: The Mental Shift of Wiping Out

    There is a psychological comfort to a foam board that you don’t realize you have until it’s gone. On a soft top, you fall, you laugh, and you climb back on. The deck is soft, the fins are usually plastic, and the stakes feel low.

    Wiping out on a hardboard hits differently. Suddenly, you are hyper-aware of where the board is, where those razor-sharp fiberglass fins are, and exactly how you are hitting the water.

    That mental shift makes you hesitate. You might find yourself paddling a bit more cautiously or committing less to a steep drop because you’re afraid of the impact. In surfing, hesitation usually means you miss the wave or fall. Learning to trust yourself on a hard, fast projectile is one of the biggest mental hurdles of the transition.

    Quick Comparison: Soft Top vs. Hard Top at a Glance

    FeatureSoft Top (Foamie)Hard Top (Fiberglass/Epoxy)
    Primary GoalLearning and funPerformance and progression
    The FeelStable, forgiving “platform”Reactive, fast, “alive”
    DurabilityHigh (hard to ding)Low (cracks easily)
    SafetyHigh (soft deck/fins) Moderate (fins/rails can be sharp)
    PaddlingHigh drag, high floatLow drag, high glide

    The 3 Biggest Technical Hurdles You’ll Face

    1) Narrower Rails & The Balance Trap

    Most hardboards have narrower, more refined rails than a chunky foamie. This makes the board much more sensitive to where you place your feet. If your pop-up isn’t centered, the board will rail-flip or wobble instantly. You have to move from “standing up” to “landing precisely.”

    2) Mastering the Duck Dive

    On a big soft top, you don’t really duck dive; you usually just “turtle roll” or push through the whitewater. With a hardboard, you are expected to sink the board cleanly under the wave. Mastering the timing and the “scoop” of a duck dive takes weeks of practice and a lot of saltwater up the nose, but it’s the only way to get out back efficiently.

    3) Overcoming the “Hesitation” Factor

    Because the board is less forgiving, your brain will tell you to play it safe. You’ll find yourself pulling back on waves you could have caught. The only way past this is repetition. You have to fall a few times to realize that while the board is hard, you are still in control. Commitment is the only way to make a hardboard work for you.

    When is the Right Time to Make the Switch?

    Don’t rush to leave your soft top. It builds your foundation, your confidence, and your wave-counting stats. A hardboard demands precision, but it only rewards you if you have the skills to handle the speed.

    When you can consistently turn both ways and you feel like the “drag” of the foam is holding back your speed, that is the moment to level up. Just be prepared to be humbled for a few sessions—it’s all part of the process.

    Frequently Asked Questions

    Are hardboards faster than soft tops?

    Yes. Fiberglass and epoxy resins create a much smoother, harder surface than foam. This reduces friction and drag against the water, allowing the board to glide faster and maintain more speed through turns.

    Will a hardboard help me turn better?

    Eventually, yes. Hardboards have “hard rails” (sharper edges) that bite into the face of the wave, giving you much more control during a turn. However, because they are more sensitive, you need better foot placement and balance than you did on a soft top.

    Should I keep my soft top after I buy a hardboard?

    Absolutely! Every surfer should have a “fun foamie” in their quiver. They are perfect for small, crowded summer days or for when you just want to relax and catch 20 waves without the pressure of performance.

  • Best Surfboards for Beginners in 2026 (The “Cheat Code” Guide)

    Best Surfboards for Beginners in 2026 (The “Cheat Code” Guide)


    When people ask me about the best surfboards for beginners, I always laugh a little, because I had to learn this lesson the hard way. When I started, I thought the board didn’t matter that much and that skill was everything. I was completely wrong.

    After years of surfing and watching new surfers progress, I am convinced that the board you start on can completely change how fast you learn. The right beginner board feels almost unfair—you catch more waves, you stay on your feet longer, and you build confidence twice as fast.

    Before you drop any money on equipment, make sure you understand the baseline of what you need by reading our How to Choose the Right Surfboard Guide. But if you are ready to buy your first board this year, here is exactly what to look for, what to avoid, and the best beginner surfboards of 2026.

    The “Beginner” Hardboard Trap (How I Got Bruised Ribs)

    I made the classic mistake of buying a board with my eyes instead of my brain. At one point, I tried what was marketed as a “beginner” hardboard. It was fiberglass with shiny rails—the kind of board that makes you feel like a “real” surfer walking down the beach.

    The problem was that “beginner” is a label that brands sometimes use very loosely. This board had way less volume and much sharper rails than I was ready for. Every wipeout hurt. Every time I paddled, the nose would dive or the board would wobble uncontrollably. Because it was hard fiberglass instead of foam, I ended up with bruised ribs more than once just from paddling.

    That painful experience taught me that looking cool on the sand means nothing if you are getting beaten up in the water.

    The Cheat Code Formula: What Actually Makes a Good Beginner Board?

    The turning point came when I swallowed my pride and jumped on a classic 8-foot foamie (soft top). I thought it looked kind of ridiculous compared to the sleek fiberglass boards in the lineup, but my first session made me realize something: that board was basically a cheat code.

    Here is the exact formula that makes a beginner surfboard actually good:

    1. Massive Volume (80–86 Liters): A board that floats you well is your single biggest advantage. High volume lets you paddle faster and catch waves effortlessly.
    2. Width and Length (Around 8 Feet): You need an 8-foot board with a wide nose. This gives you a massive, stable platform when you are executing your pop-up.
    3. Soft Materials: Foam decks and soft plastic fins are non-negotiable for safety. They protect you, and everyone around you, when you inevitably lose control.
    4. Carrying Handles: It sounds like a small detail, but when you are walking down the beach with jelly arms after an exhausting session, a built-in carrying handle suddenly feels like a brilliant design choice.

    Quick Comparison: Top Beginner Surfboards in 2026

    Surfboard ModePrice (Est.)Best FeatureThe Vibe
    Catch Surf LOG 8’0~€499Premium durability and classic style.The gold standard of foamies; incredibly buoyant.
    Ocean & Earth Ezi-Rider 8’0~€425High-density foam and excellent grip.The workhorse; built to survive absolute abuse.
    Quiksilver Break 8.0~€395Great shape and reliable performance.The balanced option from a trusted surf brand.
    Generic 8ft Mini Mal Foamie~€207Unbeatable price for first-timers.The budget entry-level; perfect if funds are tight.

    The Best Beginner Surfboards to Buy This Year

     1) Catch Surf LOG 8’0 Softboard

    If you want the premium standard of beginner boards, this is it. The Catch Surf LOG packs an absurd amount of volume, making it an absolute wave-catching machine. It has stiffer stringers inside, meaning it won’t flex and bend like cheaper foamies, giving you a surprisingly smooth ride as you start learning to turn.

    2) Ocean & Earth Ezi-Rider 8’0 Softboard

    Ocean & Earth is known for making bomb-proof gear, and the Ezi-Rider is no exception. This board is the definition of a “cheat code.” It is exceptionally wide, incredibly stable, and uses a high-density foam deck that resists getting chewed up over time. If you want a board that will last you years, this is a fantastic investment.

    3) Quiksilver Break 8.0 Softboard

    This is the perfect middle-ground board. It sits at a great price point and comes from a legacy surf brand that knows exactly how to shape a board. It provides the massive volume required for early wave catching but has slightly more refined rails, which helps you progress into your first real turns without feeling like you are driving a boat.

    4) 8ft Soft Foamie Beginner Mini Mal (Budget Option)

    If you are on a strict budget, you don’t need to spend €500 to get into the water. A generic 8-foot foam Mini Mal around the €200 mark will still provide the massive volume and soft, forgiving deck you need to safely learn your pop-up. It might not last as many seasons as the premium brands, but it will absolutely get you standing up on your first waves.

    Match Your Board to Your Body

    At the beginning, your surfboard isn’t just a piece of equipment—it is your biggest teacher in the water. Choose the board that forgives your mistakes and helps you progress.

    Now that you know what boards to look for, you need to make sure you are buying the exact right size for your height and weight. Stay tuned for our upcoming guide on How to Choose Surfboard Size, where we will break down exactly how many liters of volume you personally need to succeed!

    Frequently Asked Questions

    Why shouldn’t a beginner buy a fiberglass surfboard?

    Fiberglass surfboards (hardboards) generally have less volume, making them harder to paddle and balance on. More importantly, they are hard and have sharp fins. When a beginner inevitably wipes out or loses control of their board, a fiberglass board can cause serious injuries (like bruised ribs or cuts) to the surfer and anyone else in the water.

     What is surfboard volume and why does it matter?

    Volume is a measurement (in liters) of how much space a surfboard takes up. It determines how buoyant the board is. For a beginner, high volume (usually 70 to 90 liters) is crucial because it keeps the board floating high on the water, significantly reducing paddle fatigue and making it much easier to catch waves.

    Can I learn to surf on a 7-foot board?

    While it is possible, starting on a 7-foot board makes the learning curve much steeper for the average adult. An 8-foot foamie provides a much larger “sweet spot” for your pop-up and better glide. Only very light individuals or young children should consider starting on a board smaller than 8 feet.

  • What to Wear Surfing in Different Water Temperatures (A Survival Guide)

    What to Wear Surfing in Different Water Temperatures (A Survival Guide)

    When you first start surfing, it is easy to look at wetsuits as just a style choice or a minor detail. I used to think that if I could just tolerate the cold for a few minutes, my body would adjust and that would be enough.

    The ocean corrected that thinking pretty quickly. What you wear surfing isn’t about style—it is about survival, energy preservation, and performance.

    If you wear the wrong gear, every paddle becomes a miserable struggle. After years of trial and error, freezing feet, and brutal rashes, here is the absolute truth about what to wear surfing in different water temperatures.

    The Golden Rule: Air Temperature Means Absolutely Nothing

    I made this classic rookie mistake early on. It was a beautiful, sunny, windless day, so I convinced myself it wouldn’t be “that bad” and paddled out in just boardshorts.

    Ten minutes in, my legs were entirely numb. Twenty minutes in, I could barely feel my feet pressing against the deck of my board. My paddling felt weak, slow, and totally disconnected. I had to get out of the water early, shivering uncontrollably and incredibly frustrated.

    That day taught me the most important rule of surf gear: Air temperature means nothing. Water temperature is everything. Cold water drains your energy incredibly fast, and once your core temperature drops, your session is basically over. You dress for the water, not the weather.

    The Surfer’s Temperature Guide (Thickness Explained)

    Neoprene thickness isn’t random; it is highly strategic. Wetsuits are measured in millimeters (e.g., 3/2mm means 3mm of neoprene on the chest/back for core warmth, and 2mm on the arms/legs for flexibility)

    Warm Water (Above 20°C / 68°F): Boardshorts & Spring Suits

    If you are surfing in tropical water, you don’t need thick neoprene. Boardshorts (or a bikini/swimsuit) paired with a UPF rash guard to protect your skin from the sun and the wax on your board is perfect. If the water has a slight chill or the wind is blowing, a 2mm “spring suit” (short arms and short legs) will keep your core warm without restricting your movement.

    If the water has a slight chill or the wind is blowing, a 2mm "spring suit" (short arms and short legs) will keep your core warm without restricting your movement.

    Mild Water (15°C to 20°C / 59°F to 68°F): The Classic 3/2mm Wetsuit

    This is the most versatile wetsuit in the world. A full-length 3/2mm suit provides the perfect balance. It gives you enough core warmth to stay in the water for hours, but the 2mm arms still allow you to paddle freely without exhausting your shoulders.

    the most versatile wetsuit in the world. A full-length 3/2mm suit provides the perfect balance

    Cold Water (Below 15°C / 59°F): The 4/3mm (And Avoiding the “Boiling” Mistake)

    When the water gets cold, you need a 4/3mm suit, and occasionally neoprene booties and a hood. However, you must be careful not to overdo it.

    I once wore a thick winter suit on a warm spring day because I wrongly assumed the water was still freezing. Within fifteen minutes, I felt like I was cooking inside a rubber prison. I was overheating, sweating profusely, and I became exhausted way too quickly. Thick neoprene is a lifesaver when you need it, but when you don’t, it becomes a massive liability. Surfing demands a lot of energy; if your body is overheating, your performance drops to zero.

    When the water gets cold, you need a 4/3mm suit, and occasionally neoprene booties and a hood. However, you must be careful not to overdo it.

    The Cheap Wetsuit Trap: Why Fit is Everything

    At one point, I decided to buy a cheap wetsuit simply because it was on sale and I didn’t want to spend the money on a premium one. It was a terrible decision.

    Because it didn’t fit properly, it flushed with freezing cold water every time I duck dived under a wave. The cheap neoprene was stiff in the shoulders, making it incredibly hard to paddle, and worst of all, it gave me a brutal, stinging rash around my neck and under my arms. I spent the whole session focused on my discomfort instead of the waves.

    That taught me that fit matters way more than the brand. A good wetsuit should feel like a second skin—snug, but not restrictive, with no big air gaps and no excess folds. Quality neoprene is not something you cut corners on.

    You Have the Gear, Now Get the Skills

    The right gear doesn’t just keep you comfortable. It extends your session, protects your skin, preserves your energy, and lets you actually focus on reading waves and improving your technique.

    Once you have the right suit and you are ready to stay in the water for hours, you need to make sure your fundamental skills are sharp enough to make use of that time.

    Before you paddle out, head over to our Ultimate Guide to Surfing for Beginners: How to Start and Not Give Up. It covers all the essential techniques—from the perfect pop-up to reading the lineup—so that once you are warm and comfortable, you can actually start catching waves.

    Frequently Asked Questions About Surf Gear

    What does 3/2mm or 4/3mm mean on a wetsuit?

    These numbers refer to the thickness of the neoprene in millimeters. The first number (e.g., the “3” in 3/2) is the thickness around your chest and back to keep your vital organs warm. The second number (the “2”) is the thickness on your arms and legs, which is slightly thinner to allow for flexibility while paddling.

    Should my wetsuit feel tight when I try it on dry?

    Yes. A wetsuit should feel very snug—almost uncomfortably tight—when you try it on in a store. Neoprene loosens up and expands slightly once it gets wet. If a wetsuit feels loose or has folds of extra material when it is dry, it will fill with cold water in the ocean and drag you down.

    How do I stop my wetsuit from giving me a neck rash?

    Neck rashes usually happen when a wetsuit doesn’t fit correctly or when salt crystals get trapped between the rubber and your skin. To prevent it, ensure your suit is a snug fit, and apply a specialized anti-chafe balm (or even plain petroleum jelly) around your neck before you paddle out.

  • Surf Safety Tips for First-Time Surfers (Learned the Hard Way)

    Surf Safety Tips for First-Time Surfers (Learned the Hard Way)

    If there is one thing I wish someone had drilled into me from day one, it’s that surf safety isn’t optional. When you are a first-time surfer, you are so hyper-focused on trying to stand up that you don’t realize how many small decisions can quickly turn into big problems.

    The ocean doesn’t need to be huge to be powerful, and it certainly doesn’t give warnings in words. It teaches through experience. I definitely learned my safety lessons the hard way—getting tumbled, smacked, and dragged—but you don’t have to.

    If you want to progress faster, avoid unnecessary injuries, and actually enjoy your time in the water, here are the absolute must-know surf safety tips, born directly from my own rookie mistakes.

    Tip #1: Observe Before You Enter (Safety Starts on the Sand)

    One of the biggest mistakes beginners make is running straight from the car into the water. What I’ve learned after all these years is that safety in surfing starts before your toes even touch the ocean.

    Take ten minutes to stand on the beach and just watch. Check the conditions. Is the tide coming in or going out? Where are the experienced surfers paddling out, and more importantly, where are they exiting the water? Look for rocks, piers, or areas where the water looks chaotic. If you don’t take the time to study the environment you are about to play in, you are already putting yourself at a disadvantage.

    Women observing the waves before to start the surf session

    Tip #2: Beware the “Easy” Paddle Out (Understanding Rip Currents)

    I remember paddling out one day and thinking, “Nice, this is incredibly easy. I’m barely paddling and I’m already so far out!” I had paddled straight into a rip current without even realizing it. What I didn’t understand at the time was that this fast-moving water heading out to sea isn’t your friend; it’s a conveyor belt. Suddenly, I was way deeper than I intended to be, slightly panicking, and burning all my energy trying to paddle straight back to the beach without going anywhere.

    The Fix: You never fight a rip current directly back to shore. You stay calm, save your energy, and paddle parallel to the beach until you are out of the pull, then let the breaking waves wash you in. Even better, learn to avoid them entirely by spotting the darker, choppier channels of water where the waves aren’t breaking—that is usually where the rip is pulling out.

    never fight a rip current directly back to shore. You stay calm, save your energy, and paddle parallel to the beach until you are out of the pull

    Tip #3: Protect Your Head from Your Own Board (Always)

    Getting hit by your own board hurts your body, and it definitely hurts your pride.

    Early on, I wiped out on a wave and immediately popped my head above the surface to grab a breath. I didn’t cover my head. The board had been sucked backward by the wave, and my leash acted like a giant rubber band, snapping the board straight back at my face. Luckily, the fins missed me and it wasn’t serious, but it easily could have been.

    The Fix: Since that day, my reaction is automatic. When you fall off your board, always stay underwater for an extra second, and always surface slowly with your arms wrapping your head and face. Your surfboard is heavy, it has sharp fins, and in moving water, it is totally unpredictable. Never assume it isn’t flying right toward you.

    always stay underwater for an extra second, and always surface slowly with your arms wrapping your head and face.

    Tip #4: Never Underestimate “Small” Waves

    People tend to think surf safety is only something you worry about when the waves are massive. That is a dangerous illusion. Small waves breaking over a shallow sandbar can severely mess you up.

    I remember getting caught inside by what looked like a completely harmless, waist-high wave. But it pitched faster than I expected, caught me off guard, and slammed me directly into the bottom, rolling me over the sandbar. Because the water was so shallow, there was no cushion. I came up coughing with sand in my mouth and a brand-new respect for “fun-sized” conditions.

    The Fix: Power isn’t just about the height of the wave; it’s about how and where it breaks. Always protect your neck when falling in shallow water by falling flat (like a starfish) rather than diving headfirst.

    Small waves breaking over a shallow sandbar can severely mess you up.

    Tip #5: Don’t Fight the Ocean (And Don’t Panic)

    The golden rule of surfing is that the ocean always wins. If you get held underwater after a wipeout, your instinct will be to thrash around and fight your way to the surface. This only burns the oxygen in your lungs and induces panic.

    Relax. Let the wave roll over you. The turbulence only lasts for a few seconds, and your wetsuit and surfboard (attached to your ankle) both act as flotation devices. Surfing is incredible freedom, but it is a freedom that only works when you respect your limits and stay calm under pressure.

    Surfing is incredible freedom, but it is a freedom that only works when you respect your limits and stay calm under pressure.

    Master the Fundamentals to Stay Safe

    The best way to stay safe in the water is to know exactly what you are doing before you paddle out into the lineup. Good technique is the ultimate safety gear.

    If you want to ensure you know how to handle your board properly, how to position your weight so you don’t wipe out dangerously, and how to navigate the waves with confidence, head over to our Ultimate Guide to Surfing for Beginners: How to Start and Not Give Up. Mastering those foundational skills will keep you out of trouble and help you actually enjoy the ride.

    Frequently Asked Questions About Surf Safety

    What should I do if I get held underwater by a wave?

    The most important thing is to stay calm and not panic. The typical “hold down” for a beginner wave lasts less than 5 seconds, even if it feels much longer. Cover your head with your arms, let the turbulence pass, and once the spinning stops, grab your leash and pull yourself gently up to the surface.

    Why do I need to wear a leash?

    A leash connects your ankle to your surfboard. It is your most important piece of safety equipment for two reasons: First, your board acts as a giant life preserver that you can always pull yourself back to. Second, it prevents your heavy board from washing freely toward the beach and hitting other surfers or swimmers in the head.

     Is it safe to surf alone as a beginner?

    No, beginners should never surf entirely alone. Always surf at a beach where there are lifeguards present or where other surfers are in the water. If you get caught in a rip current, suffer a cramp, or hit your head, having people nearby can be life-saving.

  • How to Read Waves for Beginners: Stop Chasing, Start Choosing

    How to Read Waves for Beginners: Stop Chasing, Start Choosing

    Learning to read waves is the one skill that nobody really teaches you properly, yet it is the single thing that changes everything about surfing.

    When you first start, the ocean just looks like pure chaos. Every wave looks the same. You see water moving, you panic, you paddle as hard as you can, and you hope for the best. I lived in that phase for a long time. I couldn’t understand why other surfers were getting long, clean rides while I was just getting systematically destroyed by the whitewater.

    Reading waves isn’t a superpower, but it feels like one once it clicks. Before you can understand the ocean, you have to understand the mistakes you are currently making.

    Three Classic Wave-Reading Mistakes

    If you are a beginner, you are likely burning all your energy on waves that were never meant to be surfed. Here is what you are probably doing wrong:

    1. The Closeout Crusher (Paddling for Everything)

    I used to go for every single wave I saw. It didn’t matter if it looked messy or weird; I’d turn and paddle like my life depended on it. Most of the time, I was paddling for “closeouts.” A closeout is a wave that just stands up and crashes all at once across the entire length of the wave. There is no open face and no direction to ride—just a wall of water that smashes you. It took me a long time to realize that not all waves are meant to be surfed. Some are just there to teach you patience.

    2. The Direction Guessing Game (Left vs. Right)

    For a long time, I had absolutely no clue how to tell if a wave was going to peel to the left or to the right. I would pop up, ride straight toward the beach, or worse, turn the wrong way and run directly into the breaking whitewater. It felt like a random guessing game because I didn’t know how to look at the shape of the water.

    3. The “Ghost Wave” Exhaustion

    I would see a bump of water forming, think to myself, “This is it!” and paddle furiously. But the wave would just disappear underneath my board, leaving me sitting in flat water. Meanwhile, the real set of waves would arrive 30 seconds later, and I would be too exhausted to even try for them. I was reacting to the ocean’s movement, not its actual energy.

    The “Aha” Moment: How to Actually Read the Lines

    The real shift in my surfing didn’t happen in the water; it happened on the sand. I stopped rushing into the ocean and started observing. Here is the step-by-step method to change how you see the ocean.

    Step 1: The 10-Minute Horizon Rule

    Before you put your leash on, sit on the beach for 10 minutes. Do not look at the water crashing right in front of you; look far out at the horizon.

    This is where the magic happens. You will begin to notice that real waves don’t just appear out of nowhere; they come in “sets.” You will see the darker lines of energy approaching. You will see how they stack together, and how the water goes quiet for a few minutes between sets. This observation allows you to anticipate the waves rather than just reacting to them.

    Step 2: Spot the Peak (The Highest Point)

    When you are in the water and see a line approaching, look for the “peak.” The peak is the highest point of the wave, and it looks like a triangle forming on the horizon. This is where the wave will break first. If you want to catch the wave, you need to paddle toward that peak.

    Step 3: Find the Shoulder (Where is the Angle?)

    Once you see the peak, look at the water on either side of it.

    • If the water slopes down gently to the right, the wave is going to break to the right (a right-hander).
    • If it slopes down to the left, it’s a left-hander.
    • If the wave looks completely flat across the top with no angle on either side, it is a closeout—do not paddle for it.

    I remember the first day I sat in the lineup, saw a peak form, noticed the angle sloping to my right, and positioned myself perfectly. I turned, paddled, and for the first time, I didn’t have to guess. The wave opened up, and I rode it clean. It felt like I had finally cracked the code.

    When you learn to read the lines, you stop chasing waves, and you start choosing them.

    Put It Into Practice Before You Paddle Out

    Reading the ocean is a massive milestone, but spotting the perfect wave doesn’t help if you don’t know how to catch it once it arrives.

    If you want to ensure your paddling technique is efficient enough to get you to the peak, and your pop-up is solid enough to ride the open face you just identified, you need to master the absolute basics.

    Head over to our Ultimate Guide to Surfing for Beginners: How to Start and Not Give Up. It ties everything together—from choosing your board to positioning yourself in the lineup—so you can make the most out of every wave you choose to catch.

    Frequently Asked Questions About Reading Waves

    How do I know if a wave is a “Left” or a “Right”?

    In surfing, wave direction is always determined from the surfer’s perspective when they are catching the wave and facing the beach. If the wave is peeling to your right hand as you paddle for it, it is a “Right.” If it peels to your left hand, it is a “Left.” (Note: If you are watching from the beach, a “Right” will actually look like it is breaking to your left).

    What is a “Closeout” wave?

    A closeout is a wave where the entire crest of the wave breaks and crashes all at the exact same time, rather than peeling slowly to the left or right. Closeouts do not offer an open face to surf and will usually just knock you off your board.

    Why do waves come in groups?

    Ocean waves are generated by storms far out at sea. As this energy travels across the ocean, it organizes itself into groups of waves travelling at similar speeds, known as “sets.” This is why the ocean will often be flat and quiet for several minutes (a “lull”) before a set of 3 to 5 larger waves suddenly appears on the horizon.

  • Common Surfing Mistakes Beginners Make (And How I Fixed Them)

    Common Surfing Mistakes Beginners Make (And How I Fixed Them)

    I don’t care where you surf, who you are, or how fit you are, when you start surfing, you are going to make the exact same mistakes everyone else does.

    Looking back now, it’s almost funny, but at the time, it was frustrating as hell. You see other people gliding effortlessly across the water, while you feel like you are fighting a losing battle against the ocean.

    If you are currently struggling, feeling exhausted, or catching zero waves, you are probably making one of these three classic errors. Here are the biggest surfing mistakes beginners make, the painful lessons they taught me, and exactly how to fix them.

    Mistake N°1: The “Cool Board” Ego Trap

    I made this mistake right out of the gate. I bought a small, sleek fiberglass board way too early because, honestly, it looked cool. I didn’t want to be “that beginner” lugging a massive foam board down the beach.

    That ego trip cost me months of progression. That tiny board was unstable, unforgiving, and required way more skill than I actually had. I spent session after session struggling to balance, falling off, missing waves, and getting incredibly frustrated.

    Woman at the beach whit 2 different surfboard

    How To Fix?

    Progression in surfing isn’t about ego; it’s about choosing the right tool for your current level. When I finally swallowed my pride and switched back to a bigger, thicker, more stable board, it honestly felt like cheating. I started catching waves immediately. If you are a beginner, get a big foam board (8 to 9 feet long). It will give you the paddle power and stability you need to actually learn the mechanics of surfing.

    Mistake N°2: The “Anchor” Paddle (Weight Too Far Back)

    One of the most exhausting mistakes I made at the beginning was paddling with my weight too far back on the board. I didn’t even realize I was doing it. I would lie toward the tail because it felt more stable and kept the nose from diving underwater.

    The result? The nose of the board would stick up in the air, the tail would drag deep in the water like an anchor, and I felt like I was paddling forever without actually moving forward. Meanwhile, other surfers would glide past me with half the effort.

    Woman paddling with my weight too far back on the board

    How To Fix?

    Your position on the board is everything. You need to shift your weight slightly forward until the nose of the board is just an inch or two above the water. The board should sit completely flat on the surface. When I finally made this adjustment, everything changed. Suddenly I had speed, I could catch waves earlier, and paddling stopped feeling like a treadmill.

    Mistake N°3: Paddling Straight Into the Impact Zone

    This is the mistake that truly humbled me. I would spot the peak (where the waves were breaking the best), aim my board straight at it, and paddle directly into the impact zone.

    I got absolutely destroyed. I would take wave after wave of heavy whitewater straight to the face, getting pushed backward, spun around, and tossed underwater. I would lose all my energy and be gasping for air before I even made it out to the lineup.

    Paddling Straight Into the Impact Zone

    How To Fix?

    I didn’t know how to time my paddle out or how to read the ocean. You rarely paddle in a straight line in surfing. Take ten minutes on the beach to observe the ocean. Look for the “channels”, areas where the water is deeper and the waves aren’t breaking as heavily—and use them to paddle out around the impact zone. Wait for a lull between the sets of waves before making your move.

    Master the Basics Before You Paddle Out

    All of these mistakes have one thing in common: they come from ignoring the basics. Positioning, timing, and equipment matter way more than people think. Surfing isn’t just about the glorious moment of standing up; it’s about everything that happens before that moment.

    You can’t skip the beginner phase. You are going to struggle, and you are going to have days where nothing works. But every wipeout and every frustrating session is part of the process.

    However, you can save yourself months of unnecessary exhaustion by learning the correct fundamentals from day one. If you want to know exactly how to position yourself, how to choose the right board, and how to read the ocean, head over to our Ultimate Guide to Surfing for Beginners: How to Start and Not Give Up . It is the roadmap I wish I had before I bought that tiny fiberglass board.

    Frequently Asked Questions About Beginner Mistakes

    How do I know if my surfboard is too small for me?

    If you are paddling as hard as you can but the wave keeps rolling right underneath you without catching you, your board is likely too small (it lacks volume). Additionally, if the board sinks below the surface of the water when you sit on it, or if it feels incredibly wobbly when you try to pop up, you need to upgrade to a larger board with more volume.

    How do I get past the breaking waves without getting exhausted?

    Never paddle straight into the area where the waves are crashing the hardest (the impact zone). Instead, look for a rip current or a channel where the water is calmer, and use that to paddle out. Also, timing is everything, wait on the beach or in the shallow water until a “set” of big waves finishes breaking, and then paddle out quickly during the calm “lull.”

    Why does the nose of my board keep diving underwater when I catch a wave?

    This is called “pearling” or “nose-diving,” and it happens because your weight is too far forward when the wave catches you. However, beginners often overcorrect this by sliding too far back, which causes the “anchor paddle.” The trick is to arch your back and lift your chest high off the board as you paddle for the wave; this naturally adjusts your center of gravity and prevents the nose from diving.

  • How to Stand Up on a Surfboard: Master the Pop-Up (Step-by-Step)

    How to Stand Up on a Surfboard: Master the Pop-Up (Step-by-Step)

    If there is one thing every beginner obsesses over, it’s the pop-up. Learning how to stand up on a surfboard feels like trying to master a secret martial arts move. You watch the pros do it, and it looks instantaneous a fluid, effortless transition from lying down to riding the wave.

    But when you are out there in the water, it feels like chaos. You think the pop-up is the hardest part of surfing, and you assume it requires massive upper body strength.

    The truth? It is not about doing it perfectly, and it is certainly not about muscle. It is about doing it naturally. And that only comes after a lot of messy attempts. Let’s break down the true mechanics of the pop-up, the massive mistakes almost everyone makes, and how to finally find your feet.

    The Hard Truth About the Pop-Up: Commitment Over Strength

    The biggest misconception about standing up on a surfboard is that you “stand up.” You don’t. You explode into position in one smooth motion.

    When you try to slowly stand up, your weight shifts unevenly, the board wobbles, and you fall. The pop-up is about timing and absolute commitment, your hands press against the deck, you push up, bring your feet under you, and land ready, There is no halfway point.

    The Biggest Beginner Trap: Using Your Knees

    When I first started, I fell into the most common beginner trap in the world: I used my knees. Almost everyone does it. You catch the wave, panic sets in, and instead of popping up in one fluid motion, you drag one knee up, then the other, and then you try to stand.

    It feels safer. It feels like you have more control because you are keeping your center of gravity low. But it is an absolute trap, and I got stuck there for a long time.

    The problem with the “knee pop-up” is that it is too slow. By the time you are finally on your feet, the wave has already moved on, you lose your speed, you lose your balance, and you ruin your timing. Breaking that habit took serious effort, I had to force myself to fail over and over again, committing to going straight to my feet, even if it meant wiping out every single time.

    If you are currently using your knees, stop today. Accept the wipeouts until you build the muscle memory to bypass your knees entirely.

    Step-by-Step: How to Do a Proper Pop-Up

    You don’t learn the pop-up by overthinking it; you learn it by repeating the correct mechanics until your body takes over. Here is the step-by-step breakdown.

    Step 1: The Glide (Don’t Rush It)

    My real “aha” moment didn’t come on a big wave or a perfect day. I remember catching a small, clean wave, and instead of rushing the pop-up out of panic, I just let the board glide for a second.

    You need to feel the wave catch the board. Paddle hard, and when you feel the tail lift and the board start to accelerate on its own, give it one more strong paddle. Then, let it glide for a split second to stabilize before you initiate the pop-up.

    You need to feel the wave catch the board. Paddle hard, and when you feel the tail lift and the board start to accelerate on its own, give it one more strong paddle

    Step 2: Hand Placement (Under the Pectorals)

    Place your hands flat on the deck of the board, right next to your lower ribcage/pectorals. Do not grab the rails (the edges) of the board, If you grab the rails, you will inevitably pull unevenly, causing the board to flip. Keep your hands flat on top of the board.

    Place your hands flat on the deck of the board, right next to your lower ribcage/pectorals

    Step 3: The Explosive Push (One Smooth Motion)

    Push up explosively with your arms, creating space between your body and the board. In that exact same split second, swing your hips and bring both feet under your body simultaneously. Your back foot should land near the fins, and your front foot should land near the middle of the board, perfectly centered over the stringer (the line down the middle of the board).

    I remember the first time I did this right, no hesitation, no extra movements. Everything just felt… quiet. Balanced. My body finally understood what to do without me forcing it.

    Push up explosively with your arms, creating space between your body and the board.

    Step 4: Eyes Forward, Never Down

    I made this classic mistake for weeks: looking down at my feet. I thought I needed to see where I was placing them to get it right but every time I looked down, I would nose-dive (pearl), the front of the board would sink, and I would get launched over the handlebars.

    It took me way too long to understand a fundamental rule of surfing: your body follows your head, if you look down, your weight shifts forward, and you go down. If you look forward down the line of the wave, your body naturally aligns, and your weight stays centered. Keep your eyes up!

    I made this classic mistake for weeks: looking down at my feet. I thought I needed to see where I was placing them to get it right

    Put It All Together: Your Next Steps

    After that first successful pop-up, things will start to flow. Not perfectly, and not on every wave, but enough to feel the difference. One day, without even realizing it, you will stop struggling to stand up, and you will finally start surfing.

    However, a great pop-up is useless if you don’t know which waves to catch or how to paddle into them properly. The pop-up is just one piece of the puzzle.

    To make sure you are positioning yourself correctly in the ocean and reading the waves right before you even attempt to stand, head over to our Ultimate Guide to Surfing for Beginners: How to Start and Not Give Up. It covers all the foundational skills you need so that when it is time to pop up, you are already set up for success.

    Surfers Frequently Ask

    Why do I keep falling off as soon as I stand up?

    This usually happens for two reasons: you are either looking down at your feet (which throws your balance off and causes a nose-dive), or your feet are landing off-center. Your feet must land directly over the “stringer” (the wooden line running down the middle of the board) to keep the board stable.

    Can I practice the pop-up out of the water?

    Absolutely. Practicing your pop-up on dry land (in your living room or on the beach before paddling out) is one of the best ways to build muscle memory. Do 10 to 20 pop-ups every day on a yoga mat. Once your muscles know the exact movement, it becomes much easier to execute it in the water when your adrenaline is pumping.

    How do I know if I am goofy or regular footed?

    “Regular” means you surf with your left foot forward, while “Goofy” means you surf with your right foot forward. To figure it out, stand with your feet together, close your eyes, and have a friend gently push you forward from behind. The foot you naturally step out with to catch your balance is almost always your front foot on a surfboard.

  • Is Surfing Hard to Learn? The Brutally Honest Truth

    Is Surfing Hard to Learn? The Brutally Honest Truth

    Let’s cut right to the chase: Is surfing hard to learn? Yes. It is arguably one of the most difficult, frustrating, and exhausting sports you can ever try to master.

    When you watch a seasoned surfer, it looks like magic. They paddle effortlessly, pop up in a split second, and glide across the water with complete control. But the reality for a beginner is entirely different. You are not just learning a new physical skill; you are learning how to read a constantly moving, unpredictable, and incredibly powerful force of nature.

    However, if you are reading this because you are intimidated, don’t walk away just yet. The learning curve is notoriously steep, but the reward on the other side is unlike anything else on earth. Let’s break down exactly why it’s so hard, what to expect, and why it is absolutely worth the struggle.

    The Short Answer: Yes, But It’s Worth Every Wipeout

    When I started surfing, it genuinely felt like it was almost impossible. The first time I got into the water, determined to stand on the board, I ended up tumbling and swallowing saltwater more than I was actually floating.

    I remember watching other people stand up with ease while I couldn’t even manage to get to my feet without falling flat on my face. There were moments, honestly, when I seriously thought about quitting. The exhaustion, the salt in my eyes, and the constant wipeouts make you question if all that effort is really going to pay off.

    But here is the secret: every single surfer you see riding perfectly went through that exact same phase of feeling completely useless.

    Why is Surfing So Difficult? The Two Main Battles

    Unlike skateboarding or snowboarding, where the concrete or the mountain stays still while you move, surfing takes place in a dynamic environment. The “field” is constantly shifting. You have to fight two distinct battles simultaneously.

    The Physical Toll: Muscles You Didn’t Know You Had

    Surfing is essentially 90% paddling and 10% riding. Before you even get the chance to stand up, you have to paddle through incoming waves, fight currents, and position yourself correctly. It demands incredible upper body strength, core stability, and cardiovascular endurance.

    Your shoulders will burn, your lower back will ache from arching on the board, and you will be out of breath faster than you expect.

    The Mental Game: Frustration and the Ocean’s Unpredictability

    What I quickly discovered, however, is that surfing is much harder mentally than it is physically in the beginning. Yes, paddling and balancing are exhausting, but what really weighs you down is the frustration, the uncertainty, and that creeping feeling that you are never going to get it.

    Learning to read the ocean, anticipating where the waves will break, and accepting that every single fall is just part of the process requires immense patience and a cool head. It’s a mental game of endurance. That frustration is exactly where most beginners give up, and I nearly threw in the towel a couple of times myself.

    How Long Does It Actually Take to Learn?

    If you want a realistic timeline, forget the idea of becoming a competent surfer in a weekend.

    For me, it took several months of consistent practice to feel like I was actually* surfing. I’m not talking about just surviving for two seconds on the whitewater. I mean understanding how to move, how to choose the right green wave, and how to glide along the face of it without overthinking every single movement.

    Days 1-5: You will learn to balance on your stomach, paddle, and hopefully pop up in the broken whitewater.

    Weeks 2-4: You start catching unbroken waves (green waves), but you will likely nose-dive (pearl) or wipe out frequently.

    Months 3-6: With consistent practice, you start riding along the face of the wave, learning basic turns, and developing the ocean awareness that makes everything click.

    The Tipping Point: When the Frustration Disappears

    If the physical pain and mental frustration are so high, why do millions of people obsess over this sport? Because of the tipping point.

    What made all the struggle worth it for me wasn’t catching a massive, perfect wave. It was those small moments where you finally connect with the ocean and everything just clicks: the board glides, the water rushes under your feet, and for a split second, it feels like the whole world disappears.

    Those seconds of pure freedom and happiness are deeply addictive. That feeling is exactly why every fall, every mistake, and every moment of frustration you experienced in the beginning suddenly makes perfect sense. Surfing isn’t easy, but when you finally get it, you realize it was worth every ounce of effort.

    How to Make the Learning Curve Less Painful

    The harsh truth is that surfing is hard to learn, but you don’t have to make it harder than it needs to be. The biggest mistake beginners make is trying to figure it all out by trial and error, using the wrong equipment, or picking the wrong beaches.

    You can drastically reduce your frustration by mastering the fundamentals *before* you paddle out. If you are serious about getting past the wipeout phase and actually enjoying the ride, you need a solid foundation.

    To learn the exact steps, techniques, and ocean knowledge you need to succeed, dive into our Ultimate Guide to Surfing for Beginners: How to Start and Not Give Up We cover everything from the perfect pop-up to surviving your first major wipeout.

    Don’t quit. Embrace the struggle. The best ride of your life is waiting just past the break.

    Frequently Asked Questions (FAQ) About Learning to Surf

    Is surfing harder to learn than snowboarding or skateboarding?

    Yes, for one primary reason: the environment. In snowboarding or skateboarding, the mountain or the concrete is static. In surfing, the ocean is constantly moving. You have to learn to read the waves, manage currents, and paddle into a moving target before you even attempt to stand up and balance.

    Can I learn to surf if I’m out of shape?

    You can start, but you will progress much slower and tire out quickly. Surfing demands significant cardiovascular fitness, upper body strength for paddling, and core strength for popping up. Improving your general fitness, particularly through swimming and yoga, will make learning to surf drastically easier.

    Am I too old to learn how to surf?

    Absolutely not. While younger people might have an edge in natural flexibility and fearlessness, adults of any age can learn to surf. The key is to start on a large, stable foam board, choose beginner-friendly waves, and focus on slow, steady progression rather than trying to do aggressive maneuvers right away.