Author: OceanRoad

  • How to Read Waves for Beginners: Stop Chasing, Start Choosing

    How to Read Waves for Beginners: Stop Chasing, Start Choosing

    Learning to read waves is the one skill that nobody really teaches you properly, yet it is the single thing that changes everything about surfing.

    When you first start, the ocean just looks like pure chaos. Every wave looks the same. You see water moving, you panic, you paddle as hard as you can, and you hope for the best. I lived in that phase for a long time. I couldn’t understand why other surfers were getting long, clean rides while I was just getting systematically destroyed by the whitewater.

    Reading waves isn’t a superpower, but it feels like one once it clicks. Before you can understand the ocean, you have to understand the mistakes you are currently making.

    Three Classic Wave-Reading Mistakes

    If you are a beginner, you are likely burning all your energy on waves that were never meant to be surfed. Here is what you are probably doing wrong:

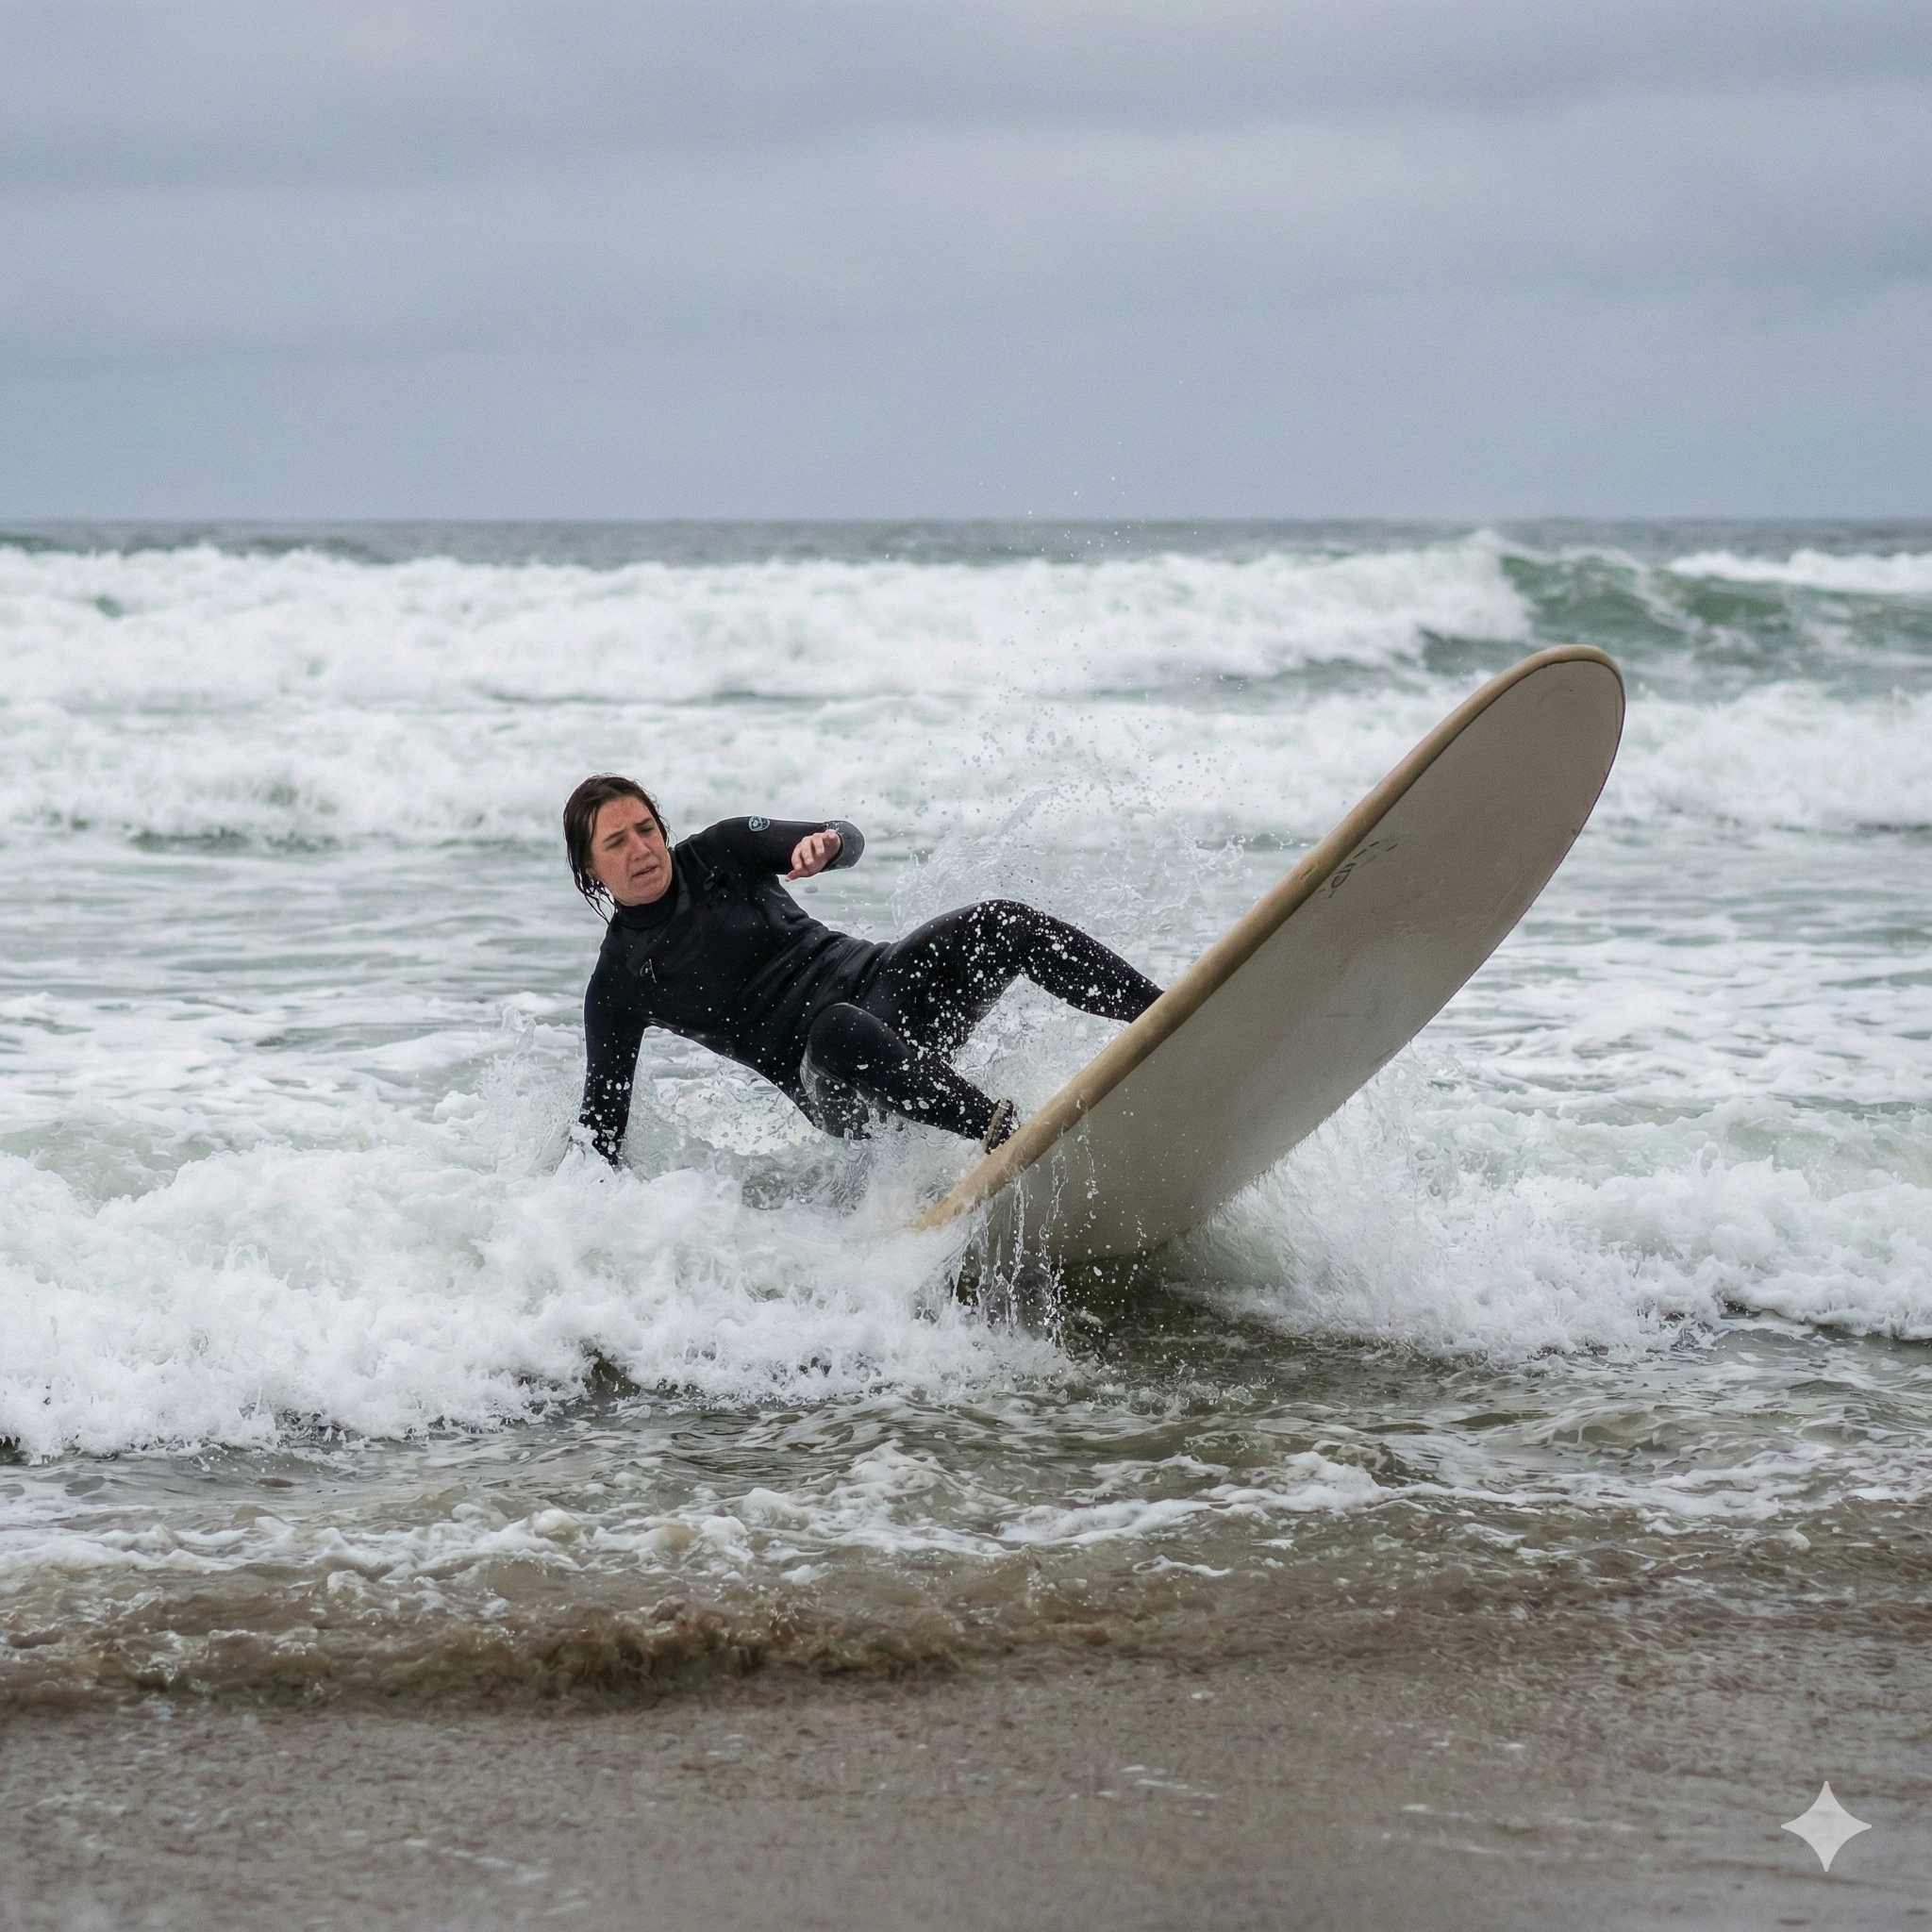
    1. The Closeout Crusher (Paddling for Everything)

    I used to go for every single wave I saw. It didn’t matter if it looked messy or weird; I’d turn and paddle like my life depended on it. Most of the time, I was paddling for “closeouts.” A closeout is a wave that just stands up and crashes all at once across the entire length of the wave. There is no open face and no direction to ride—just a wall of water that smashes you. It took me a long time to realize that not all waves are meant to be surfed. Some are just there to teach you patience.

    2. The Direction Guessing Game (Left vs. Right)

    For a long time, I had absolutely no clue how to tell if a wave was going to peel to the left or to the right. I would pop up, ride straight toward the beach, or worse, turn the wrong way and run directly into the breaking whitewater. It felt like a random guessing game because I didn’t know how to look at the shape of the water.

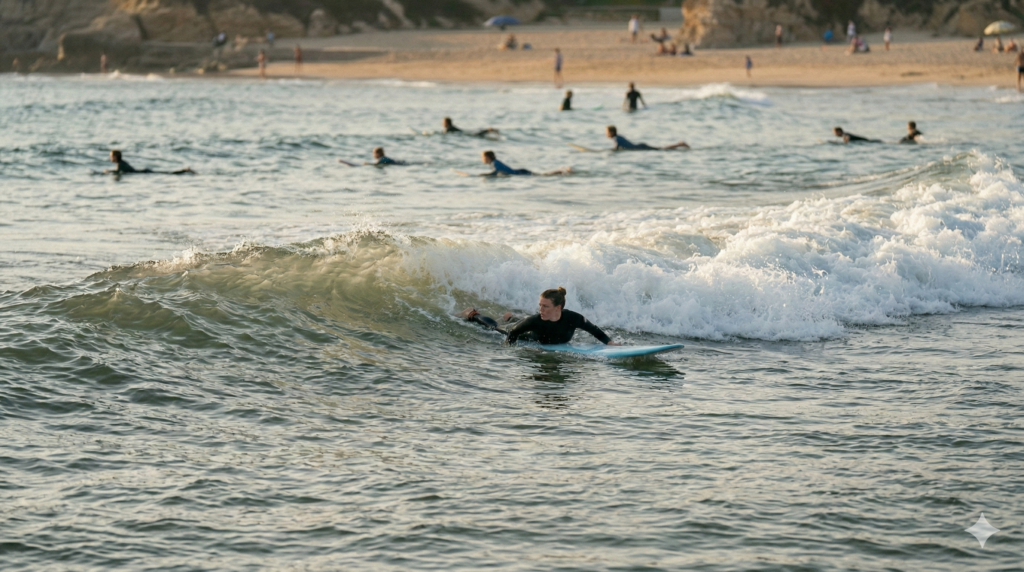
    3. The “Ghost Wave” Exhaustion

    I would see a bump of water forming, think to myself, “This is it!” and paddle furiously. But the wave would just disappear underneath my board, leaving me sitting in flat water. Meanwhile, the real set of waves would arrive 30 seconds later, and I would be too exhausted to even try for them. I was reacting to the ocean’s movement, not its actual energy.

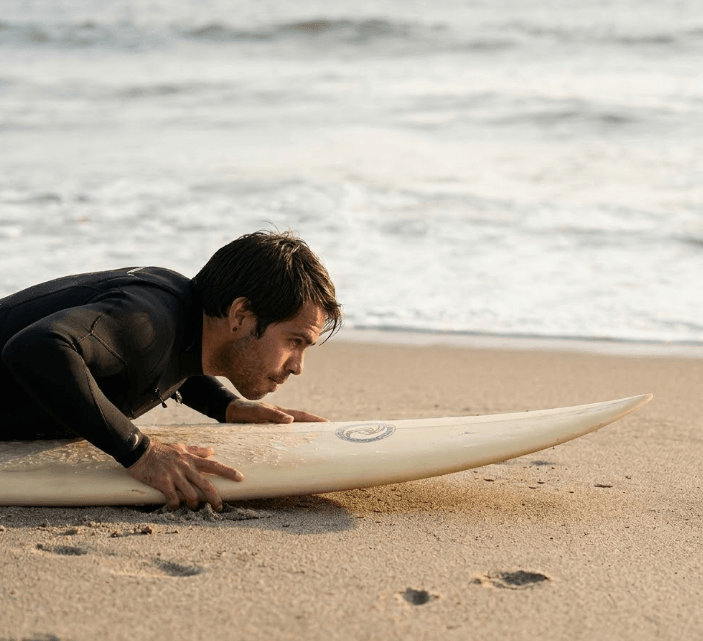
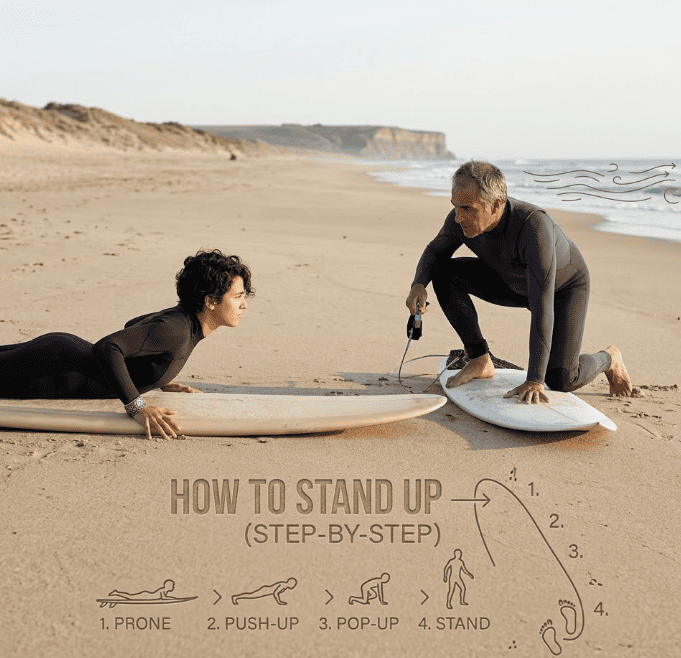
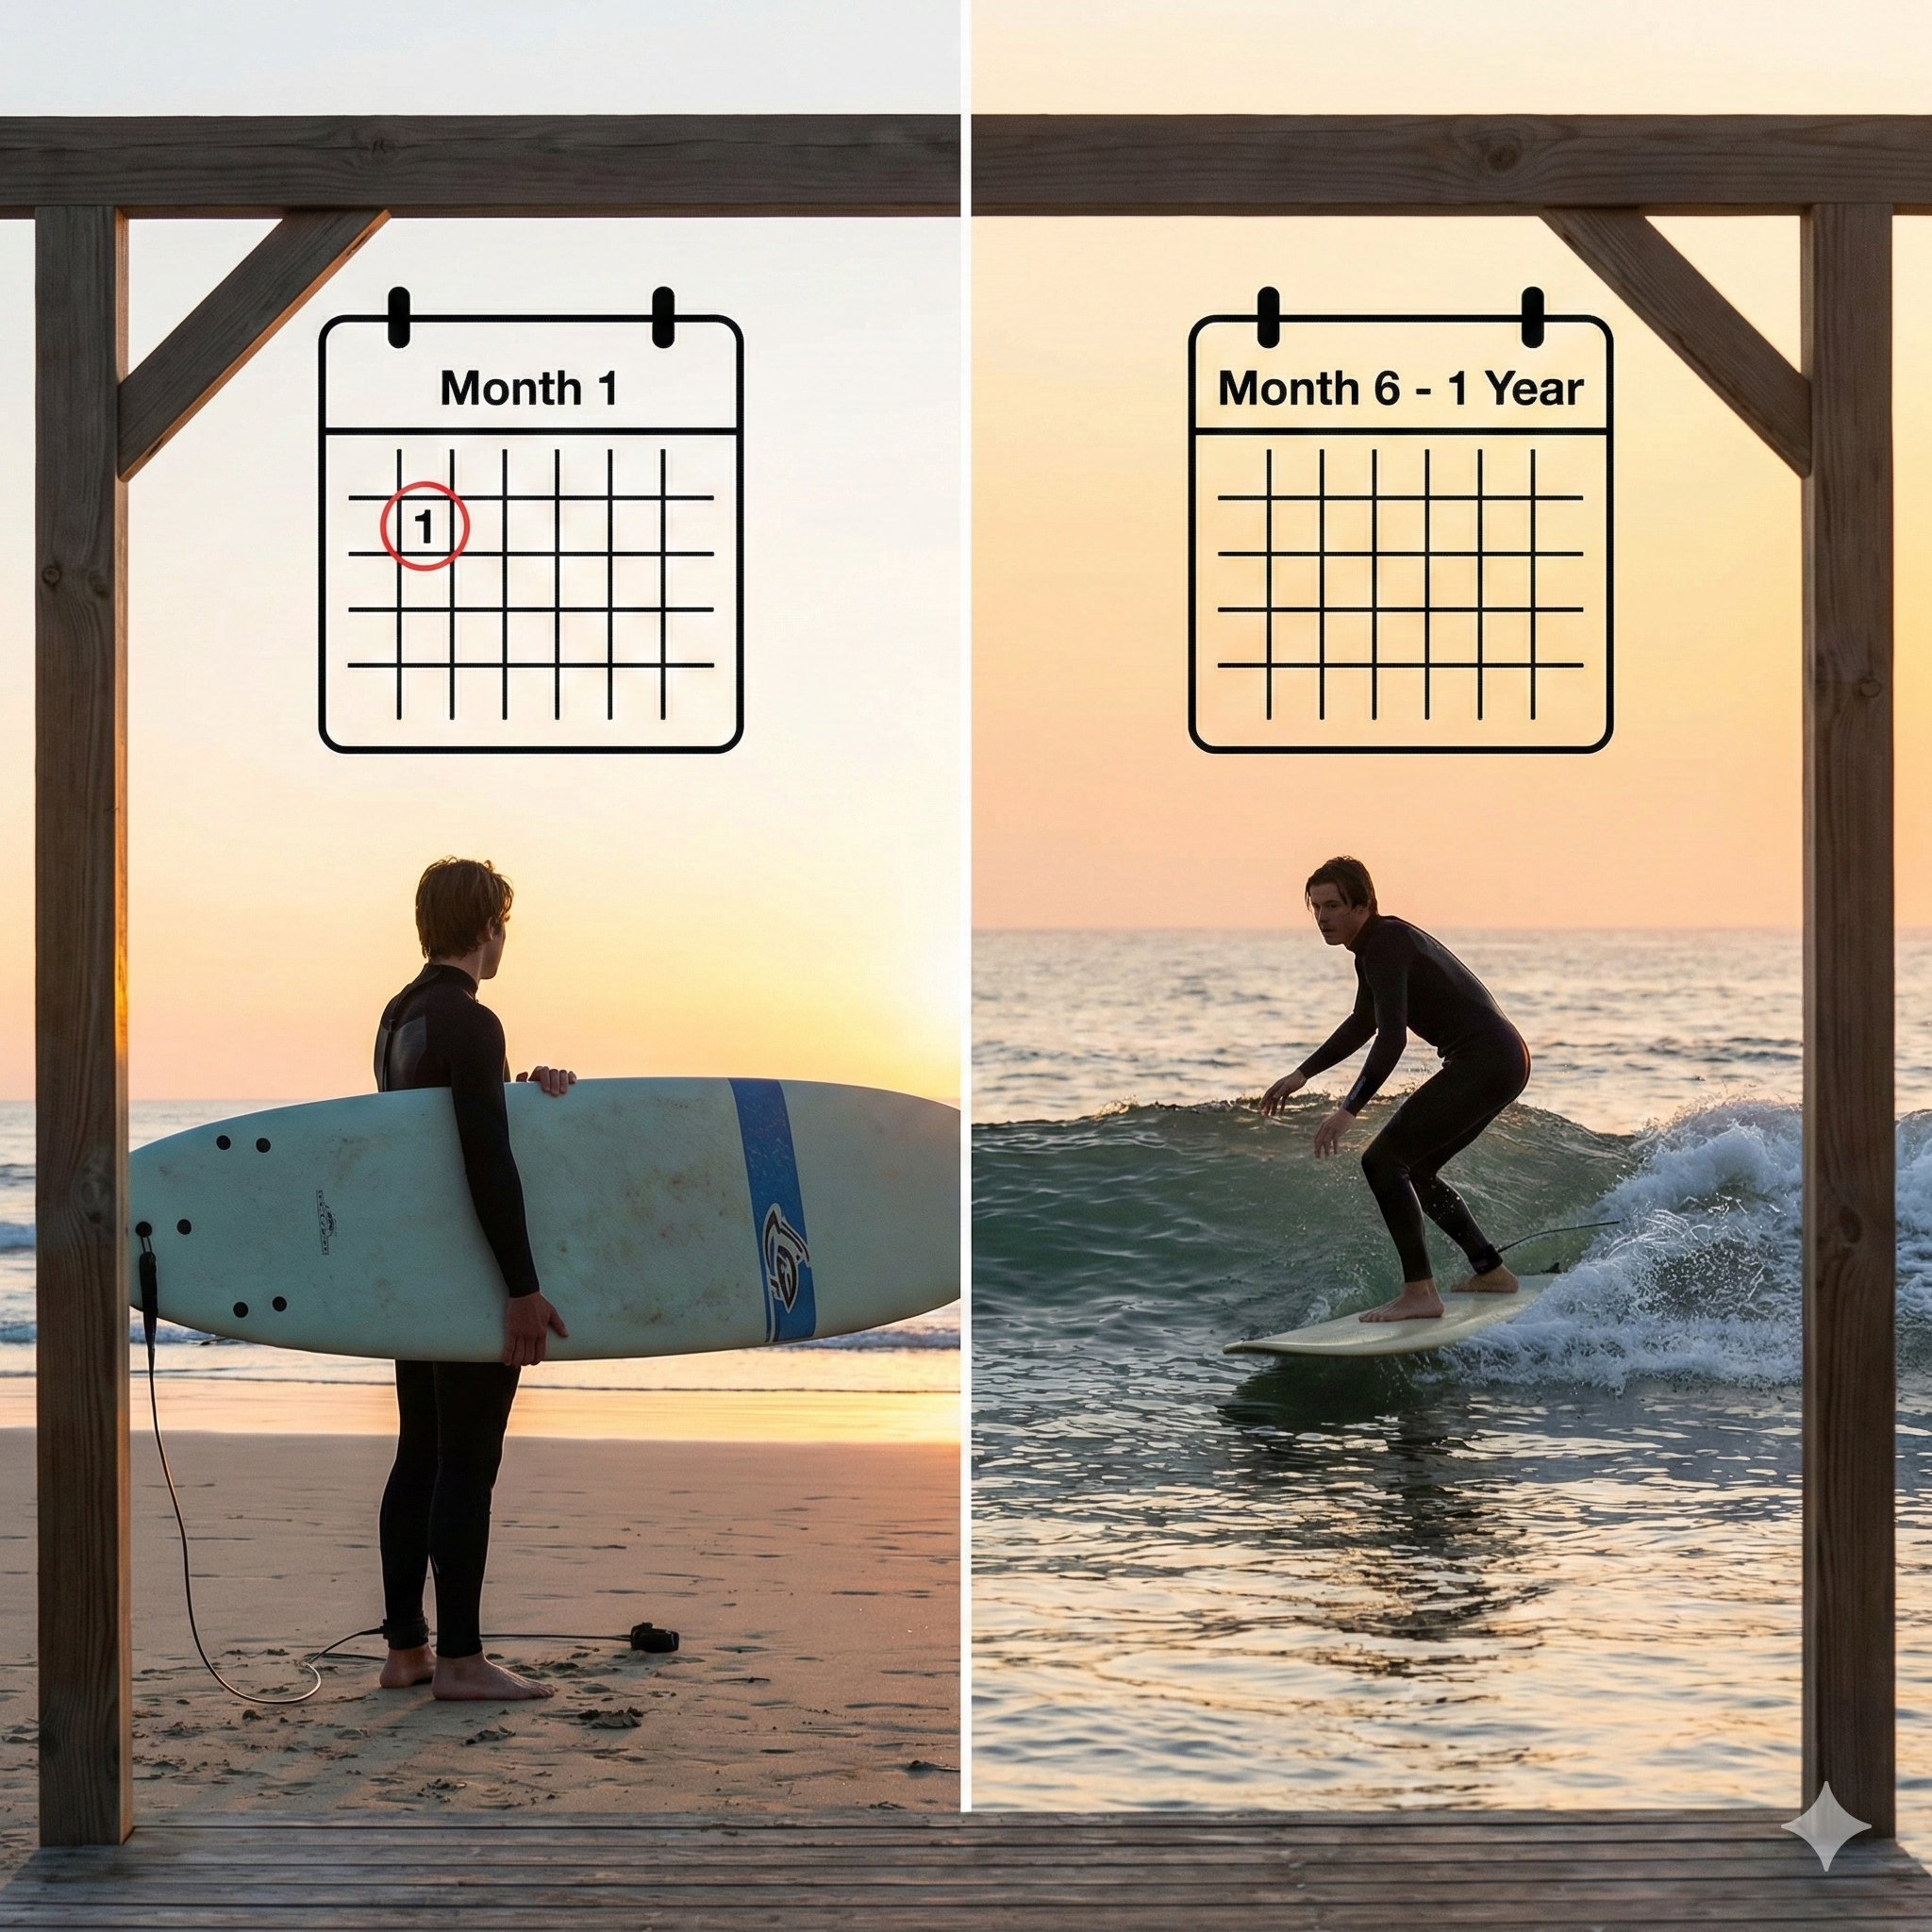
    The “Aha” Moment: How to Actually Read the Lines

    The real shift in my surfing didn’t happen in the water; it happened on the sand. I stopped rushing into the ocean and started observing. Here is the step-by-step method to change how you see the ocean.

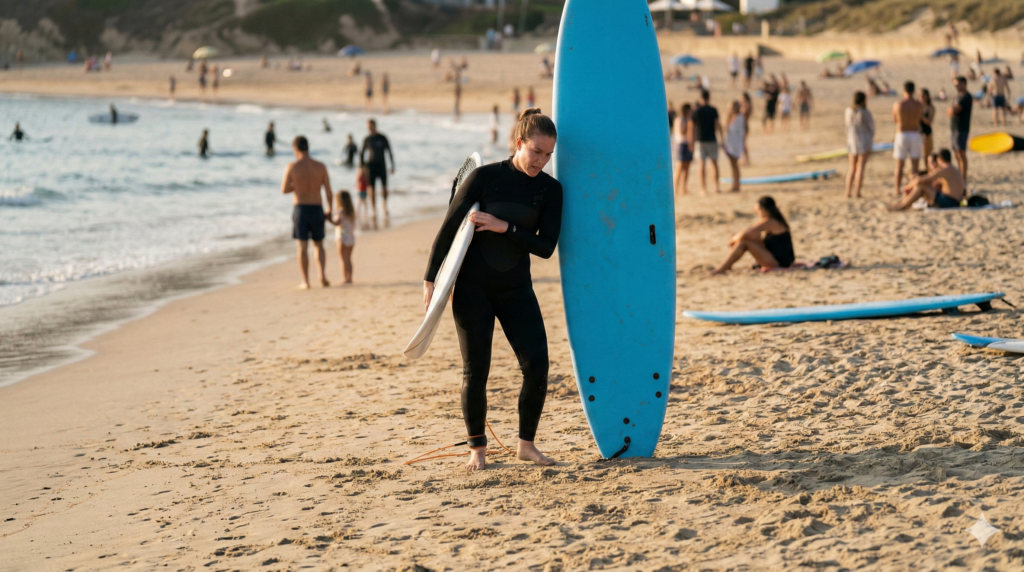
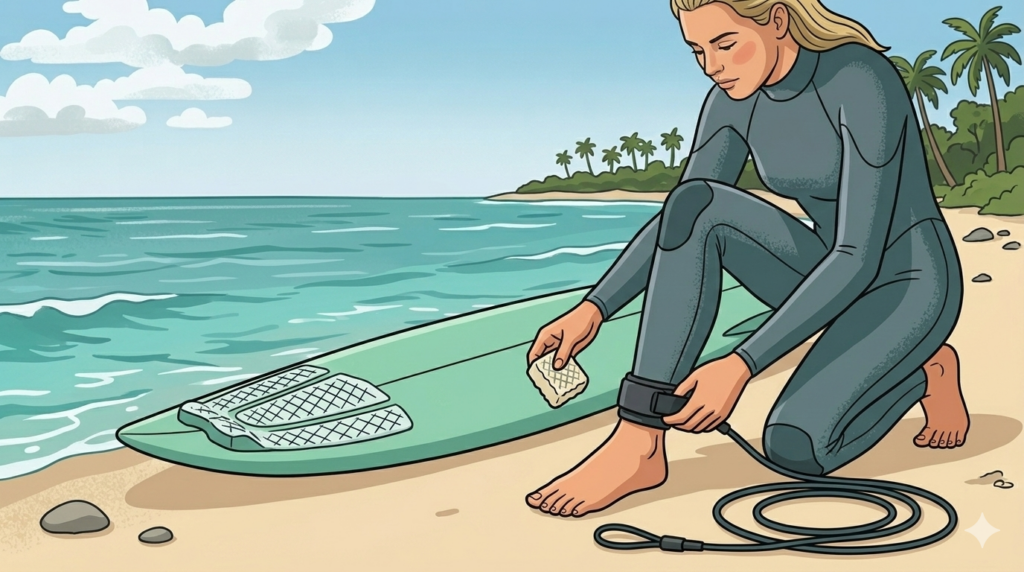
    Step 1: The 10-Minute Horizon Rule

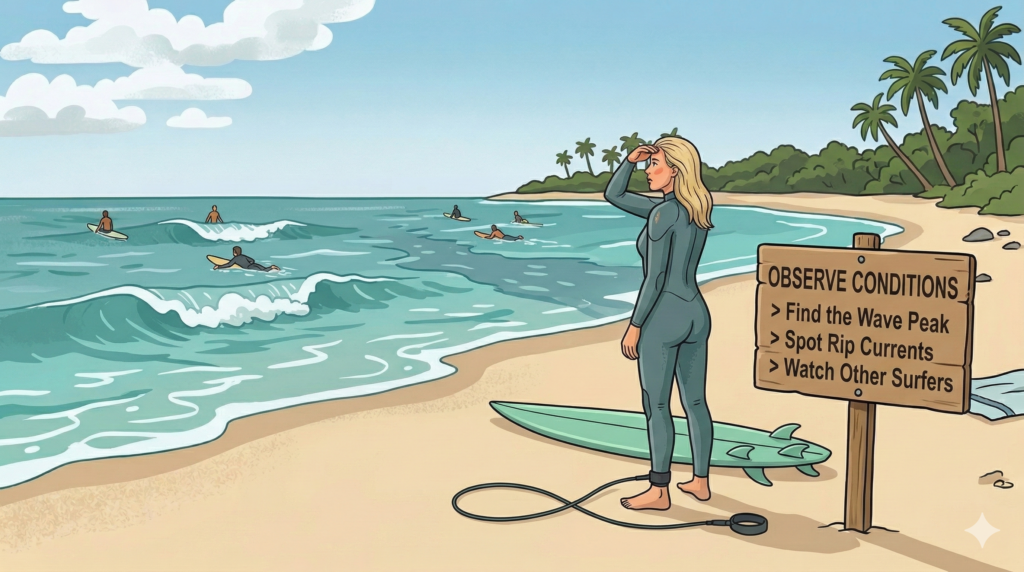
    Before you put your leash on, sit on the beach for 10 minutes. Do not look at the water crashing right in front of you; look far out at the horizon.

    This is where the magic happens. You will begin to notice that real waves don’t just appear out of nowhere; they come in “sets.” You will see the darker lines of energy approaching. You will see how they stack together, and how the water goes quiet for a few minutes between sets. This observation allows you to anticipate the waves rather than just reacting to them.

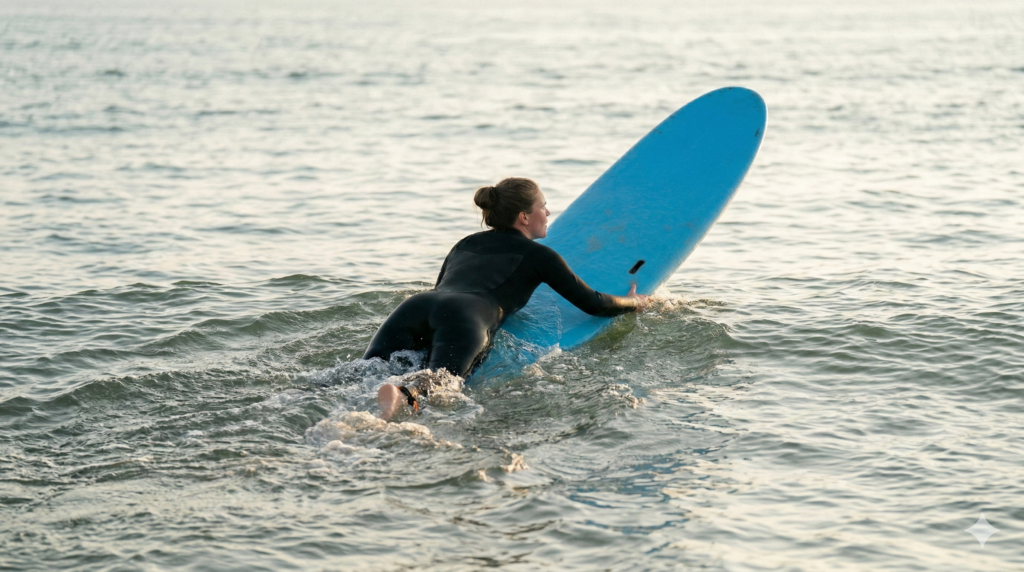
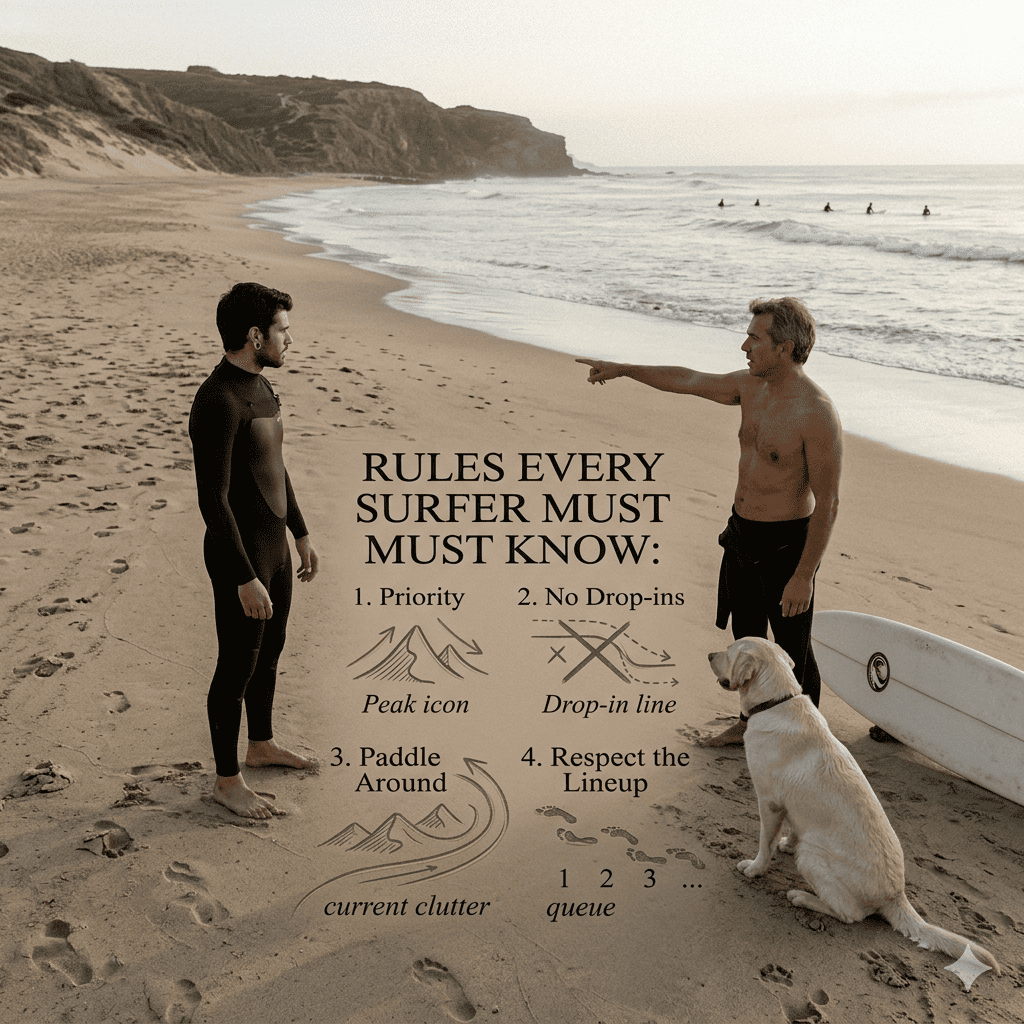
    Step 2: Spot the Peak (The Highest Point)

    When you are in the water and see a line approaching, look for the “peak.” The peak is the highest point of the wave, and it looks like a triangle forming on the horizon. This is where the wave will break first. If you want to catch the wave, you need to paddle toward that peak.

    Step 3: Find the Shoulder (Where is the Angle?)

    Once you see the peak, look at the water on either side of it.

    • If the water slopes down gently to the right, the wave is going to break to the right (a right-hander).
    • If it slopes down to the left, it’s a left-hander.
    • If the wave looks completely flat across the top with no angle on either side, it is a closeout—do not paddle for it.

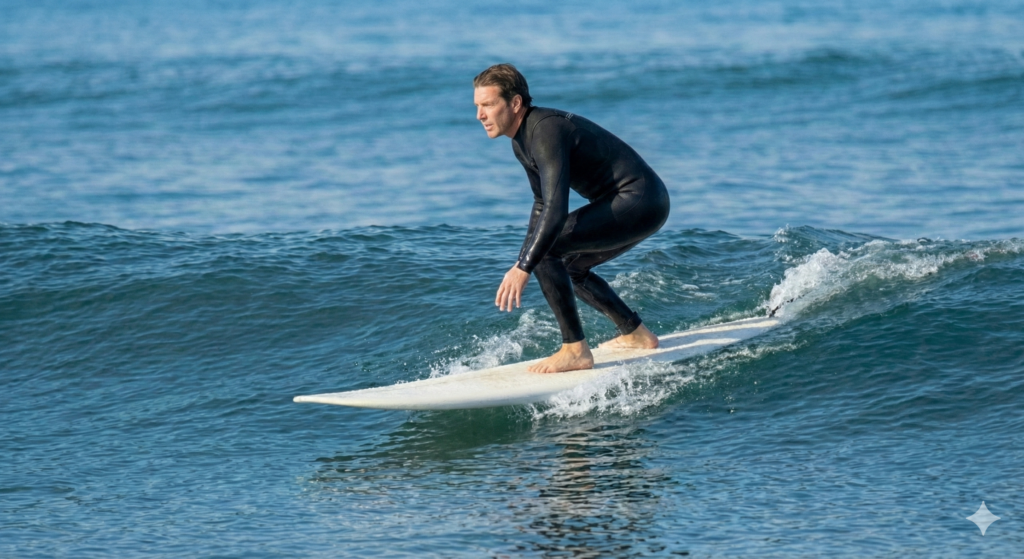
    I remember the first day I sat in the lineup, saw a peak form, noticed the angle sloping to my right, and positioned myself perfectly. I turned, paddled, and for the first time, I didn’t have to guess. The wave opened up, and I rode it clean. It felt like I had finally cracked the code.

    When you learn to read the lines, you stop chasing waves, and you start choosing them.

    Put It Into Practice Before You Paddle Out

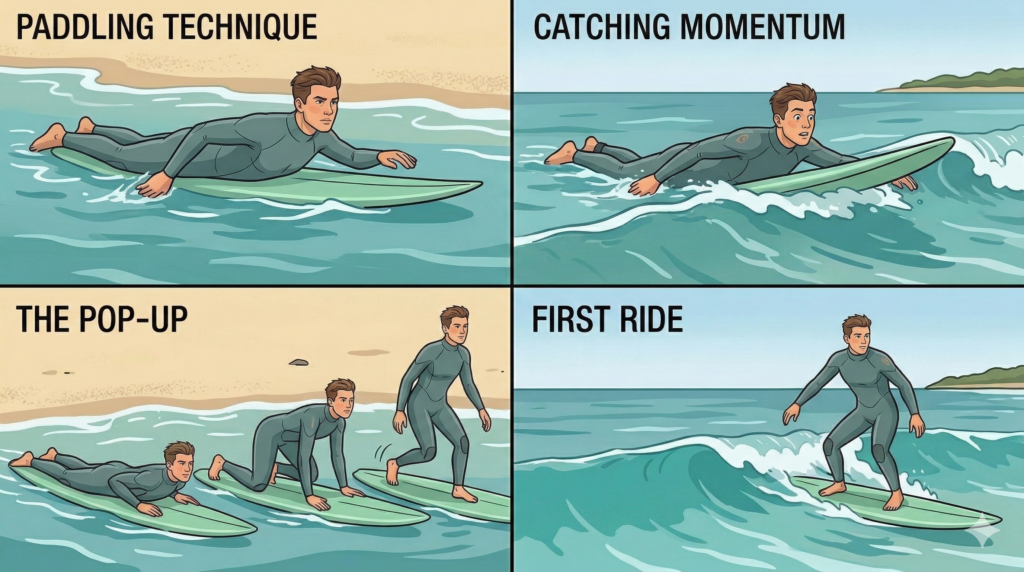
    Reading the ocean is a massive milestone, but spotting the perfect wave doesn’t help if you don’t know how to catch it once it arrives.

    If you want to ensure your paddling technique is efficient enough to get you to the peak, and your pop-up is solid enough to ride the open face you just identified, you need to master the absolute basics.

    Head over to our Ultimate Guide to Surfing for Beginners: How to Start and Not Give Up. It ties everything together—from choosing your board to positioning yourself in the lineup—so you can make the most out of every wave you choose to catch.

    Frequently Asked Questions About Reading Waves

    How do I know if a wave is a “Left” or a “Right”?

    In surfing, wave direction is always determined from the surfer’s perspective when they are catching the wave and facing the beach. If the wave is peeling to your right hand as you paddle for it, it is a “Right.” If it peels to your left hand, it is a “Left.” (Note: If you are watching from the beach, a “Right” will actually look like it is breaking to your left).

    What is a “Closeout” wave?

    A closeout is a wave where the entire crest of the wave breaks and crashes all at the exact same time, rather than peeling slowly to the left or right. Closeouts do not offer an open face to surf and will usually just knock you off your board.

    Why do waves come in groups?

    Ocean waves are generated by storms far out at sea. As this energy travels across the ocean, it organizes itself into groups of waves travelling at similar speeds, known as “sets.” This is why the ocean will often be flat and quiet for several minutes (a “lull”) before a set of 3 to 5 larger waves suddenly appears on the horizon.

  • Common Surfing Mistakes Beginners Make (And How I Fixed Them)

    Common Surfing Mistakes Beginners Make (And How I Fixed Them)

    I don’t care where you surf, who you are, or how fit you are, when you start surfing, you are going to make the exact same mistakes everyone else does.

    Looking back now, it’s almost funny, but at the time, it was frustrating as hell. You see other people gliding effortlessly across the water, while you feel like you are fighting a losing battle against the ocean.

    If you are currently struggling, feeling exhausted, or catching zero waves, you are probably making one of these three classic errors. Here are the biggest surfing mistakes beginners make, the painful lessons they taught me, and exactly how to fix them.

    Mistake N°1: The “Cool Board” Ego Trap

    I made this mistake right out of the gate. I bought a small, sleek fiberglass board way too early because, honestly, it looked cool. I didn’t want to be “that beginner” lugging a massive foam board down the beach.

    That ego trip cost me months of progression. That tiny board was unstable, unforgiving, and required way more skill than I actually had. I spent session after session struggling to balance, falling off, missing waves, and getting incredibly frustrated.

    Woman at the beach whit 2 different surfboard

    How To Fix?

    Progression in surfing isn’t about ego; it’s about choosing the right tool for your current level. When I finally swallowed my pride and switched back to a bigger, thicker, more stable board, it honestly felt like cheating. I started catching waves immediately. If you are a beginner, get a big foam board (8 to 9 feet long). It will give you the paddle power and stability you need to actually learn the mechanics of surfing.

    Mistake N°2: The “Anchor” Paddle (Weight Too Far Back)

    One of the most exhausting mistakes I made at the beginning was paddling with my weight too far back on the board. I didn’t even realize I was doing it. I would lie toward the tail because it felt more stable and kept the nose from diving underwater.

    The result? The nose of the board would stick up in the air, the tail would drag deep in the water like an anchor, and I felt like I was paddling forever without actually moving forward. Meanwhile, other surfers would glide past me with half the effort.

    Woman paddling with my weight too far back on the board

    How To Fix?

    Your position on the board is everything. You need to shift your weight slightly forward until the nose of the board is just an inch or two above the water. The board should sit completely flat on the surface. When I finally made this adjustment, everything changed. Suddenly I had speed, I could catch waves earlier, and paddling stopped feeling like a treadmill.

    Mistake N°3: Paddling Straight Into the Impact Zone

    This is the mistake that truly humbled me. I would spot the peak (where the waves were breaking the best), aim my board straight at it, and paddle directly into the impact zone.

    I got absolutely destroyed. I would take wave after wave of heavy whitewater straight to the face, getting pushed backward, spun around, and tossed underwater. I would lose all my energy and be gasping for air before I even made it out to the lineup.

    Paddling Straight Into the Impact Zone

    How To Fix?

    I didn’t know how to time my paddle out or how to read the ocean. You rarely paddle in a straight line in surfing. Take ten minutes on the beach to observe the ocean. Look for the “channels”, areas where the water is deeper and the waves aren’t breaking as heavily—and use them to paddle out around the impact zone. Wait for a lull between the sets of waves before making your move.

    Master the Basics Before You Paddle Out

    All of these mistakes have one thing in common: they come from ignoring the basics. Positioning, timing, and equipment matter way more than people think. Surfing isn’t just about the glorious moment of standing up; it’s about everything that happens before that moment.

    You can’t skip the beginner phase. You are going to struggle, and you are going to have days where nothing works. But every wipeout and every frustrating session is part of the process.

    However, you can save yourself months of unnecessary exhaustion by learning the correct fundamentals from day one. If you want to know exactly how to position yourself, how to choose the right board, and how to read the ocean, head over to our Ultimate Guide to Surfing for Beginners: How to Start and Not Give Up . It is the roadmap I wish I had before I bought that tiny fiberglass board.

    Frequently Asked Questions About Beginner Mistakes

    How do I know if my surfboard is too small for me?

    If you are paddling as hard as you can but the wave keeps rolling right underneath you without catching you, your board is likely too small (it lacks volume). Additionally, if the board sinks below the surface of the water when you sit on it, or if it feels incredibly wobbly when you try to pop up, you need to upgrade to a larger board with more volume.

    How do I get past the breaking waves without getting exhausted?

    Never paddle straight into the area where the waves are crashing the hardest (the impact zone). Instead, look for a rip current or a channel where the water is calmer, and use that to paddle out. Also, timing is everything, wait on the beach or in the shallow water until a “set” of big waves finishes breaking, and then paddle out quickly during the calm “lull.”

    Why does the nose of my board keep diving underwater when I catch a wave?

    This is called “pearling” or “nose-diving,” and it happens because your weight is too far forward when the wave catches you. However, beginners often overcorrect this by sliding too far back, which causes the “anchor paddle.” The trick is to arch your back and lift your chest high off the board as you paddle for the wave; this naturally adjusts your center of gravity and prevents the nose from diving.

  • How to Stand Up on a Surfboard: Master the Pop-Up (Step-by-Step)

    How to Stand Up on a Surfboard: Master the Pop-Up (Step-by-Step)

    If there is one thing every beginner obsesses over, it’s the pop-up. Learning how to stand up on a surfboard feels like trying to master a secret martial arts move. You watch the pros do it, and it looks instantaneous a fluid, effortless transition from lying down to riding the wave.

    But when you are out there in the water, it feels like chaos. You think the pop-up is the hardest part of surfing, and you assume it requires massive upper body strength.

    The truth? It is not about doing it perfectly, and it is certainly not about muscle. It is about doing it naturally. And that only comes after a lot of messy attempts. Let’s break down the true mechanics of the pop-up, the massive mistakes almost everyone makes, and how to finally find your feet.

    The Hard Truth About the Pop-Up: Commitment Over Strength

    The biggest misconception about standing up on a surfboard is that you “stand up.” You don’t. You explode into position in one smooth motion.

    When you try to slowly stand up, your weight shifts unevenly, the board wobbles, and you fall. The pop-up is about timing and absolute commitment, your hands press against the deck, you push up, bring your feet under you, and land ready, There is no halfway point.

    The Biggest Beginner Trap: Using Your Knees

    When I first started, I fell into the most common beginner trap in the world: I used my knees. Almost everyone does it. You catch the wave, panic sets in, and instead of popping up in one fluid motion, you drag one knee up, then the other, and then you try to stand.

    It feels safer. It feels like you have more control because you are keeping your center of gravity low. But it is an absolute trap, and I got stuck there for a long time.

    The problem with the “knee pop-up” is that it is too slow. By the time you are finally on your feet, the wave has already moved on, you lose your speed, you lose your balance, and you ruin your timing. Breaking that habit took serious effort, I had to force myself to fail over and over again, committing to going straight to my feet, even if it meant wiping out every single time.

    If you are currently using your knees, stop today. Accept the wipeouts until you build the muscle memory to bypass your knees entirely.

    Step-by-Step: How to Do a Proper Pop-Up

    You don’t learn the pop-up by overthinking it; you learn it by repeating the correct mechanics until your body takes over. Here is the step-by-step breakdown.

    Step 1: The Glide (Don’t Rush It)

    My real “aha” moment didn’t come on a big wave or a perfect day. I remember catching a small, clean wave, and instead of rushing the pop-up out of panic, I just let the board glide for a second.

    You need to feel the wave catch the board. Paddle hard, and when you feel the tail lift and the board start to accelerate on its own, give it one more strong paddle. Then, let it glide for a split second to stabilize before you initiate the pop-up.

    You need to feel the wave catch the board. Paddle hard, and when you feel the tail lift and the board start to accelerate on its own, give it one more strong paddle

    Step 2: Hand Placement (Under the Pectorals)

    Place your hands flat on the deck of the board, right next to your lower ribcage/pectorals. Do not grab the rails (the edges) of the board, If you grab the rails, you will inevitably pull unevenly, causing the board to flip. Keep your hands flat on top of the board.

    Place your hands flat on the deck of the board, right next to your lower ribcage/pectorals

    Step 3: The Explosive Push (One Smooth Motion)

    Push up explosively with your arms, creating space between your body and the board. In that exact same split second, swing your hips and bring both feet under your body simultaneously. Your back foot should land near the fins, and your front foot should land near the middle of the board, perfectly centered over the stringer (the line down the middle of the board).

    I remember the first time I did this right, no hesitation, no extra movements. Everything just felt… quiet. Balanced. My body finally understood what to do without me forcing it.

    Push up explosively with your arms, creating space between your body and the board.

    Step 4: Eyes Forward, Never Down

    I made this classic mistake for weeks: looking down at my feet. I thought I needed to see where I was placing them to get it right but every time I looked down, I would nose-dive (pearl), the front of the board would sink, and I would get launched over the handlebars.

    It took me way too long to understand a fundamental rule of surfing: your body follows your head, if you look down, your weight shifts forward, and you go down. If you look forward down the line of the wave, your body naturally aligns, and your weight stays centered. Keep your eyes up!

    I made this classic mistake for weeks: looking down at my feet. I thought I needed to see where I was placing them to get it right

    Put It All Together: Your Next Steps

    After that first successful pop-up, things will start to flow. Not perfectly, and not on every wave, but enough to feel the difference. One day, without even realizing it, you will stop struggling to stand up, and you will finally start surfing.

    However, a great pop-up is useless if you don’t know which waves to catch or how to paddle into them properly. The pop-up is just one piece of the puzzle.

    To make sure you are positioning yourself correctly in the ocean and reading the waves right before you even attempt to stand, head over to our Ultimate Guide to Surfing for Beginners: How to Start and Not Give Up. It covers all the foundational skills you need so that when it is time to pop up, you are already set up for success.

    Surfers Frequently Ask

    Why do I keep falling off as soon as I stand up?

    This usually happens for two reasons: you are either looking down at your feet (which throws your balance off and causes a nose-dive), or your feet are landing off-center. Your feet must land directly over the “stringer” (the wooden line running down the middle of the board) to keep the board stable.

    Can I practice the pop-up out of the water?

    Absolutely. Practicing your pop-up on dry land (in your living room or on the beach before paddling out) is one of the best ways to build muscle memory. Do 10 to 20 pop-ups every day on a yoga mat. Once your muscles know the exact movement, it becomes much easier to execute it in the water when your adrenaline is pumping.

    How do I know if I am goofy or regular footed?

    “Regular” means you surf with your left foot forward, while “Goofy” means you surf with your right foot forward. To figure it out, stand with your feet together, close your eyes, and have a friend gently push you forward from behind. The foot you naturally step out with to catch your balance is almost always your front foot on a surfboard.

  • Surf Etiquette: Unwritten Rules Every Surfer Must Know

    Surf Etiquette: Unwritten Rules Every Surfer Must Know

    When you first start surfing, everyone focuses on teaching you how to paddle, how to pop up, and how to balance. But there is a massive piece of the puzzle that nobody properly explains until it’s too late: in the ocean, it’s not just you and the waves. There are other people, and with them come the unwritten rules of the lineup, the famous “surf etiquette.”

    Let me be clear right from the start: ignoring these rules won’t just make you unpopular, it can be incredibly dangerous.

    I learned this the hard way. Before you try to execute the perfect turn or catch the biggest wave of the day, you need to learn how to exist in the water. Here are the absolute, non-negotiable rules of surf etiquette, born from the mistakes I made so you don’t have to.

    Why Etiquette is About Survival, Not Just Politeness

    Rule 1: Understand Priority (Don’t “Drop In”)

    The most sacred rule in surfing is the right of way. The rule is simple: the surfer closest to the peak (the breaking part of the wave) has priority. If someone is already up and riding, or is closer to the curl than you, you must stop paddling.

    In my early days, I had no idea how priority worked. I remember paddling furiously for a beautiful wave, completely focused on the horizon, without looking over my shoulder, I popped up right in the path of another surfer who was already speeding down the line. I got yelled at, I panicked, we both fell, and we narrowly avoided a serious collision.

    I didn’t do it out of malice; I did it out of pure ignorance but the ocean doesn’t care about your intentions. I paddled back to the beach feeling terrible, like I didn’t belong there, that day I realized that looking left and right before catching a wave is a matter of safety, not just manners.

    Rule 2: Never Ditch Your Board (Ever)

    When you are a beginner paddling out, your natural instinct when a massive wall of whitewater approaches is to let go of your board and dive underneath. Do not do this.

    The ocean taught me this lesson forcefully, one day, a set of waves came through that was much larger than I expected. Instead of pushing through the foam or attempting a turtle roll, panic took over and I ditched my board. The wave caught my board, stretched my leash to its absolute limit, and launched my heavy foam board backward like a missile. It nearly hit another surfer who was paddling out right behind me.

    Thankfully, no one was hurt, but it could have been catastrophic, that moment changed my perspective forever: your surfboard is not just your tool; it is your responsibility, you must maintain control of it at all times.

    Rule 3: Don’t Be a Snake (And How to Handle Wave Hogs)

    “Snaking” is when a surfer deliberately paddles around someone who has been waiting patiently, just to get closer to the peak and steal priority.

    As a beginner, I got “snaked” more times than I can count, people would see that I was a novice, paddle right past me, and take off on the wave I was perfectly positioned for. Initially, it frustrated me deeply. It felt incredibly unfair.

    Over time, I realized that while getting snaked is part of the game, there is a distinct difference between someone who doesn’t know the rules and someone who just doesn’t respect them. The solution isn’t to yell or fight; the solution is to learn how to position yourself better. As your skills improve, you learn to hold your ground, sit in the right spot, and project confidence, when you show that you know what you are doing, the wave hogs naturally back off.

    Rule 4: Apologize When You Mess Up

    You are going to make mistakes. You will accidentally drop in on someone, you will get in the way of someone’s ride, and you will blow a takeoff.

    When it happens, a simple, genuine apology goes a long way. Lifting your hand and saying “My bad, I’m sorry!” instantly defuses the tension. Surfers are generally forgiving if they see that you are actively trying to learn and respect the rules. Acknowledging your mistake immediately changes the vibe in the lineup from hostile to understanding.

    The Golden Rule: The Best Surfer in the Water…

    Over the years, you realize that surf etiquette is not just a rigid set of rules; it is fundamentally about respect. Respect for the raw power of the ocean, respect for the people sharing it with you, and respect for yourself.

    Looking before you paddle, controlling your board, giving people their space, and apologizing when you mess up, these are basic concepts, but they are the glue that holds the lineup together. When everyone follows them, the atmosphere in the water is pure magic, when they don’t, the tension is palpable.

    Ultimately, being a good surfer isn’t just about doing cutbacks or riding big waves. It is about knowing how to carry yourself in the water. Because the best surfer in the lineup isn’t the one who catches the most waves; it’s the one everyone else is happy to have sitting next to them.

    Learn the Basics Before You Paddle Out

    Knowing the rules of the road is useless if you don’t know how to drive the car. Before you paddle out into a crowded lineup and worry about priority, you need to make sure your fundamental skills are sharp.

    If you want to build the confidence to paddle out, catch your own waves, and safely navigate the lineup, head over to our Ultimate Guide to Surfing for Beginners: How to Start and Not Give Up. It covers all the essential techniques you need to control your board and start having fun without getting in anyone’s way.

    Frequently Asked Questions About Surf Etiquette

    What does it mean to “drop in” on someone?

    Dropping in means catching a wave that someone else is already riding or is about to catch from a position closer to the breaking part of the wave (the peak). The person closest to the peak always has the right of way. Dropping in is the biggest taboo in surfing because it ruins the other person’s wave and often causes collisions.

    What should I do if a big wave is coming and I can’t duck dive?

    If you are on a large foam board or longboard and cannot duck dive under a breaking wave, you should perform a “turtle roll” (flipping the board upside down and holding tightly to the rails while underwater). Never just let go of your board and dive; your leash will stretch, and your board will fly back and hit anyone paddling behind you.

    Who has the right of way if a wave peaks in the middle and breaks both ways?

    If a wave is an “A-frame” (peaking in the middle and breaking both left and right equally), two surfers can ride it at the same time, one going left and one going right. Before taking off, surfers will usually communicate by calling out “Going left!” or “Going right!” to avoid crossing paths.

  • Best Beaches for Beginner Surfers: How to Avoid the Tourist Trap

    Best Beaches for Beginner Surfers: How to Avoid the Tourist Trap

    When you start surfing, everyone talks to you about the “best beaches,” the famous spots, and the perfect waves. But what nobody tells you is that many of those world-renowned beaches are absolutely terrible for beginners.

    I fell into that trap more than once. I remember traveling to a very famous spot (the kind that looks perfect in photos) thinking I was about to have the session of my life. It ended up being a complete nightmare. I paddled out into a lineup with a shallow rock bottom, a strong sweeping current, and a peak crowded with aggressive locals who knew exactly what they were doing. I had no idea where to position myself. I spent more time dodging flying surfboards and surviving wipeouts than actually trying to surf.

    That day taught me a vital lesso, a famous beach is not always a good beach to learn on If you want to progress, you need to know exactly what makes a beach beginner-friendly.

    What Actually Makes a Beach “Beginner-Friendly”?

    Over the years, I completely changed how I choose where to surf. I stopped looking for the most spectacular waves and started valuing much simpler, but far more important, elements.

    1. Sandy Bottoms (Beach Breaks)
      • This is crucial. You want a “beach break,” which means the waves break over a submerged sandbar, rather than a “reef break” or “point break” where waves crash over sharp coral or solid rock. A sandy bottom allows you to make mistakes without fear. You can fall off your board a hundred times and get tumbled underwater without worrying about smashing your knees or head against a reef.
    2. Long Whitewater and Slow-Peeling Waves
      • As a beginner, you don’t want fast, hollow waves that barrel, you need waves that break softly and crumble slowly. Even better, you want a beach that produces long lines of whitewater (the foam). Long whitewater gives you the time you desperately need to react, find your balance, and practice your pop-up without the wave disappearing beneath you in a second.
    3. A Chill Vibe and Space to Fail
      • Something that doesn’t seem important until you experience it is the vibe in the water. A crowded peak full of experts is intimidating and dangerous for a novice. You need a beach with enough space to spread out, where the atmosphere is relaxed, and where you have the room to make mistakes without the pressure of ruining someone else’s ride.

    The Algarve (Portugal): A Masterclass in Beginner Beaches

    If you want a real world example of what perfect beginner beaches look like, look no further than the Algarve and the southwest coast of Portugal, it’s a region blessed with consistent swells and miles of sandy breaks.

    Here are two beaches that perfectly illustrate what you should be looking for when planning your first surf trip.
    Praia do Amado: Space to Breathe and Progress.

    Praia do Amado: Space to Breathe and Progress

    Praia do Amado is the textbook definition of a beginner friendly beach, it is a massive stretch of sand with multiple peaks, which means the crowd naturally spreads out.

    I had a session there that I will never forget, the swell was small and organized, offering incredibly long, forgiving lines of whitewater. Because there was so much space, I could catch wave after wave without any stress or chaos. I remember paddling back out to the peak and realizing something profound, I wasn’t nervous, I wasn’t overthinking my technique, I was just in the right place, doing what I had to do, and purely enjoying the glide, that is the exact environment you need to progress.

    Praia da Arrifana: Beautiful but Demanding Respect

    Arrifana is one of the most stunning beaches in Europe, tucked beneath massive cliffs, it is an excellent spot for learners, but it also taught me the importance of observation.

    Depending on the day and the tide, Arrifana can be demanding, the first time I went there, I arrived with high expectations but also a healthy dose of respect, the waves were manageable and clean, but I still hesitated. Instead of rushing in, I sat on the sand for twenty minutes, I watched how the sets rolled in, where the waves were breaking, and where the safe channels were to paddle out.

    When I finally entered the water, everything started to flow. It wasn’t my best session in terms of technical maneuvers, but it was one of the first times I felt like I truly understood the environment, I didn’t feel lost. I walked out of the water thinking, “Okay, this is finally starting to make sense.”

    The Verdict: Choose Progression Over Pictures

    Ultimately, the best beach for a beginner surfer is not the most famous one, nor the most spectacular one on Instagram, it is the beach that allows you to learn without fear, to make mistakes without severe consequences, and to actually enjoy the process. When you find a place like that, you stop fighting the ocean and slowly begin to feel like you are a part of it.

    Before You Hit the Sand: Your Next Steps

    Finding the perfect sandy beach is only half the battle. Once you are there, you need to know what to do when the water hits your knees.

    If you have chosen your beach but still struggle with paddling efficiently, standing up without falling, or understanding ocean safety, you need a solid foundation before you paddle out. Check out our Ultimate Guide to Surfing for Beginners: How to Start and Not Give Up. It is the perfect companion to ensure your first trip to a beginner beach is a success, not a struggle.

    Frequently Asked Questions About Beginner Surf Spots

    What is the difference between a beach break and a reef break?

    A beach break features waves crashing over a shifting sandy bottom, they are generally safer and more forgiving, making them ideal for beginners. A reef break features waves crashing over coral or solid rock, these waves are often more powerful, hollow, and extremely dangerous to fall on, making them strictly for advanced surfers.

    Should I avoid surfing if a beach is crowded?

    As a beginner, yes, you should avoid heavily crowded main “peaks.” Crowds increase the risk of collisions and create a stressful environment. Look for a beach break where you can walk a few hundred yards down the sand to find an empty spot of whitewater to practice on, away from the experienced surfers.

    Why are the beaches in the Algarve (Portugal) so good for learning?

    The southwest coast of Portugal, particularly the Algarve, faces the Atlantic Ocean, which provides highly consistent swells year-round, more importantly, the region is full of wide, sandy beach breaks (like Praia do Amado) that offer the safe, soft, and long-rolling waves that beginners need to practice their pop-ups safely.

  • How Long Does It Take to Learn Surfing? The Honest Timeline

    How Long Does It Take to Learn Surfing? The Honest Timeline

    If you search online for how long it takes to learn to surf, you will usually find a neat little timeline: “two hours to stand up, two weeks to turn, and a few months to catch green waves.

    Let me save you some major frustration: that is almost never how it actually happens.

    Learning to surf is not a simple equation of weeks or months. It is entirely dependent on how long you are willing to make mistakes without giving up. When I first started, I genuinely believed that in a couple of weeks, I would be surfing like the guys I saw in the videos. The reality was a harsh wake-up call. It took significantly longer than I imagined to feel like I was actually surfing and not just fighting for survival in the water.

    So, how long does it really take? Let’s break down the true phases of learning to surf, why you will inevitably hit a wall, and what actually accelerates your progress.

    The 4 True Phases of Learning to Sur

    Forget timelines for a second. Progression in surfing is measured by milestones, not by the calendar.

    Phase 1: Fighting the Foam (and Your Ego)

    The beginning is purely about survival. You are fighting the whitewater, trying to find your balance on the board, and falling off within seconds.

    This is also the phase where yoru ego will sabotage you the most. Looking back, the thing that delayed my learning more than anything else was wanting to skip ahead. I wanted to paddle out to bigger waves before I was ready, I tried using a board that was way too small for my skill level, and I constantly compared myself to other surfers. If you want to get out of this phase quickly, swallow your pride: get a big foam board and stay in the small whitewater until your pop-up is muscle memory.

    Phase 2: The Dangerous Plateau

    After the initial excitement of standing up in the foam, you will hit a wall. I was stuck in this phase for months, and it is the most dangerous part of learning because this is where the vast majority of people quit.

    For months, I felt like I wasn’t progressing at all. I kept wiping out, I was constantly arriving late to the waves, and I was incredibly frustrated. It feels like you are spinning your wheels. But the strange truth is that you are improving during this plateau; the changes in your paddle strength, your balance, and your ocean awareness are just too small to notice day by day. You have to push through this phase blindly trusting the process.

    Phase 3: The “Click” Moment

    If you survive the plateau, you will eventually experience the click.

    For me, it wasn’t a spectacular day or a massive, perfect wave. It was a quiet morning with small waves. Suddenly, I just stopped overthinking every move. I paddled, felt the wave lift the tail of my board, executed the pop-up almost without hesitation, and I stayed on my feet.

    It wasn’t just that I stood up; it was that I finally understood what was happening. I started reading the wave and feeling the timing. That quiet morning was the exact moment I transitioned from fighting the ocean to actually surfing it.

    Phase 4: Non-Linear Progression

    Once you hit that click, you realize that learning to surf is never a straight line. You will have days where you feel like you’ve advanced months in a single session, followed by days where you feel like you’ve forgotten how to paddle and you regress completely. Accept that this is part of the journey. You aren’t failing; the ocean is just offering you different conditions.

    What Actually Accelerates Your Learning?

    Time in the water is essential, but how you use that time is what dictates your speed of learning.

    When I stopped rushing into the water and started observing the ocean from the beach first, everything changed. Taking 10 minutes to understand where the waves were breaking and choosing my attempts carefully made a massive difference.

    Furthermore, surrounding yourself with the right people accelerates your progress exponentially. Surfing with people who were more experienced than me forced me to paddle harder, position myself better, and learn by watching their technique up close.

    The Shortest Path to the “Click” Moment

    Learning to surf is a chaotic, frustrating, and incredibly beautiful process. If you are consistent, if you accept the plateau, and if you stop obsessing over the immediate result, you will eventually reach a point where you aren’t fighting the foam anymore. You are choosing waves, you are flowing, and you are having fun. And when that happens, you realize that all those frustrating months weren’t a delay, they were the path.

    However, you can make that path significantly shorter by mastering the fundamentals from day one. You need to know exactly how to paddle efficiently, how to read the lineup, and how to execute a flawless pop-up.

    If you want to skip the trial-and-error phase and reach that “click” moment faster, you need a solid foundation. Head over to our Ultimate Guide to Surfing for Beginners: How to Start and Not Give Up. It breaks down the exact techniques you need to progress from the whitewater to the green waves without wasting months on bad habits.

    Frequently Asked Questions About Learning Timelines

    How many lessons does it take to learn to surf?

    Most beginners can learn to stand up on a foam board in the whitewater within their very first 2-hour lesson. However, to learn how to paddle out, read unbroken waves, and catch them independently, most people need between 5 to 10 structured lessons combined with several months of consistent solo practice.

    Why do I feel like I am getting worse at surfing?

    This is incredibly common and usually means you have transitioned to different wave conditions or a smaller board before you were fully ready. It can also be mental fatigue. Progress in surfing is non-linear; a bad session doesn’t mean you’ve lost your skills, it just means the ocean was challenging that day.

    Can I learn to surf if I only go once a month?

    Yes, but your progression will be extremely slow. Surfing relies heavily on “water memory” and specific muscle conditioning. If you only surf once a month, you will spend the first half of every session just re-acclimating to the board and the paddle exhaustion. To see real progress, try to surf at least 2 to 3 times a week during your learning phase.

  • Is Surfing Hard to Learn? The Brutally Honest Truth

    Is Surfing Hard to Learn? The Brutally Honest Truth

    Let’s cut right to the chase: Is surfing hard to learn? Yes. It is arguably one of the most difficult, frustrating, and exhausting sports you can ever try to master.

    When you watch a seasoned surfer, it looks like magic. They paddle effortlessly, pop up in a split second, and glide across the water with complete control. But the reality for a beginner is entirely different. You are not just learning a new physical skill; you are learning how to read a constantly moving, unpredictable, and incredibly powerful force of nature.

    However, if you are reading this because you are intimidated, don’t walk away just yet. The learning curve is notoriously steep, but the reward on the other side is unlike anything else on earth. Let’s break down exactly why it’s so hard, what to expect, and why it is absolutely worth the struggle.

    The Short Answer: Yes, But It’s Worth Every Wipeout

    When I started surfing, it genuinely felt like it was almost impossible. The first time I got into the water, determined to stand on the board, I ended up tumbling and swallowing saltwater more than I was actually floating.

    I remember watching other people stand up with ease while I couldn’t even manage to get to my feet without falling flat on my face. There were moments, honestly, when I seriously thought about quitting. The exhaustion, the salt in my eyes, and the constant wipeouts make you question if all that effort is really going to pay off.

    But here is the secret: every single surfer you see riding perfectly went through that exact same phase of feeling completely useless.

    Why is Surfing So Difficult? The Two Main Battles

    Unlike skateboarding or snowboarding, where the concrete or the mountain stays still while you move, surfing takes place in a dynamic environment. The “field” is constantly shifting. You have to fight two distinct battles simultaneously.

    The Physical Toll: Muscles You Didn’t Know You Had

    Surfing is essentially 90% paddling and 10% riding. Before you even get the chance to stand up, you have to paddle through incoming waves, fight currents, and position yourself correctly. It demands incredible upper body strength, core stability, and cardiovascular endurance.

    Your shoulders will burn, your lower back will ache from arching on the board, and you will be out of breath faster than you expect.

    The Mental Game: Frustration and the Ocean’s Unpredictability

    What I quickly discovered, however, is that surfing is much harder mentally than it is physically in the beginning. Yes, paddling and balancing are exhausting, but what really weighs you down is the frustration, the uncertainty, and that creeping feeling that you are never going to get it.

    Learning to read the ocean, anticipating where the waves will break, and accepting that every single fall is just part of the process requires immense patience and a cool head. It’s a mental game of endurance. That frustration is exactly where most beginners give up, and I nearly threw in the towel a couple of times myself.

    How Long Does It Actually Take to Learn?

    If you want a realistic timeline, forget the idea of becoming a competent surfer in a weekend.

    For me, it took several months of consistent practice to feel like I was actually* surfing. I’m not talking about just surviving for two seconds on the whitewater. I mean understanding how to move, how to choose the right green wave, and how to glide along the face of it without overthinking every single movement.

    Days 1-5: You will learn to balance on your stomach, paddle, and hopefully pop up in the broken whitewater.

    Weeks 2-4: You start catching unbroken waves (green waves), but you will likely nose-dive (pearl) or wipe out frequently.

    Months 3-6: With consistent practice, you start riding along the face of the wave, learning basic turns, and developing the ocean awareness that makes everything click.

    The Tipping Point: When the Frustration Disappears

    If the physical pain and mental frustration are so high, why do millions of people obsess over this sport? Because of the tipping point.

    What made all the struggle worth it for me wasn’t catching a massive, perfect wave. It was those small moments where you finally connect with the ocean and everything just clicks: the board glides, the water rushes under your feet, and for a split second, it feels like the whole world disappears.

    Those seconds of pure freedom and happiness are deeply addictive. That feeling is exactly why every fall, every mistake, and every moment of frustration you experienced in the beginning suddenly makes perfect sense. Surfing isn’t easy, but when you finally get it, you realize it was worth every ounce of effort.

    How to Make the Learning Curve Less Painful

    The harsh truth is that surfing is hard to learn, but you don’t have to make it harder than it needs to be. The biggest mistake beginners make is trying to figure it all out by trial and error, using the wrong equipment, or picking the wrong beaches.

    You can drastically reduce your frustration by mastering the fundamentals *before* you paddle out. If you are serious about getting past the wipeout phase and actually enjoying the ride, you need a solid foundation.

    To learn the exact steps, techniques, and ocean knowledge you need to succeed, dive into our Ultimate Guide to Surfing for Beginners: How to Start and Not Give Up We cover everything from the perfect pop-up to surviving your first major wipeout.

    Don’t quit. Embrace the struggle. The best ride of your life is waiting just past the break.

    Frequently Asked Questions (FAQ) About Learning to Surf

    Is surfing harder to learn than snowboarding or skateboarding?

    Yes, for one primary reason: the environment. In snowboarding or skateboarding, the mountain or the concrete is static. In surfing, the ocean is constantly moving. You have to learn to read the waves, manage currents, and paddle into a moving target before you even attempt to stand up and balance.

    Can I learn to surf if I’m out of shape?

    You can start, but you will progress much slower and tire out quickly. Surfing demands significant cardiovascular fitness, upper body strength for paddling, and core strength for popping up. Improving your general fitness, particularly through swimming and yoga, will make learning to surf drastically easier.

    Am I too old to learn how to surf?

    Absolutely not. While younger people might have an edge in natural flexibility and fearlessness, adults of any age can learn to surf. The key is to start on a large, stable foam board, choose beginner-friendly waves, and focus on slow, steady progression rather than trying to do aggressive maneuvers right away.

  • What Do You Need to Start Surfing? The Essential Beginner Gear Guide

    What Do You Need to Start Surfing? The Essential Beginner Gear Guide

    When you first get the urge to surf, it’s easy to imagine that all you need is a board, some waves, and the willpower to paddle out. You picture yourself running into the ocean, catching a wave effortlessly, and walking back onto the sand looking like a pro.

    Nothing could be further from the truth. You quickly learn that the right preparation and equipment are the difference between an incredible day and one you deeply regret.

    The surf industry is massive, and it will try to sell you every gadget under the sun. But what do you actually need to start surfing? Not much. However, the few things you do need must be chosen wisely. Let’s break down the absolute essentials, the things that will protect you, and the “magic” accessories you should completely avoid.

    The Golden Rule of Surf Gear: Protection Over Aesthetics

    Looking back on my early days in the water, I realized something important: I used to think surf gear was just about looking cool or fitting into the culture. But the real purpose of your equipment is protection and comfort.

    When you are protected from the sun, the cold, and the friction of the board, you can actually focus on reading the waves, paddling, and standing up. You stop worrying about scrapes or freezing water, and you start enjoying the moment. That level of comfort is what turns a frustrating first attempt into a memorable session.

    The Absolute Essentials (Don’t Overcomplicate It)

    If you are just starting, your shopping list should be incredibly short. Here is exactly what you need to get into the water safely.

    The Surfboard: Why Foam is Your Best Friend

    Do not buy a shortboard. Do not buy a high-performance fiberglass board just because it looks fast. Your first board should be a foam board (softboard), usually between 8 and 9 feet long.

    Foam boards are buoyant, making them easy to paddle, and they are stable enough to give you time to find your balance. More importantly, they are soft. When you are learning, the board will hit you. A foam board will leave a bruise; a fiberglass board can send you to the hospital.

    The Leash: Keep It Simple and Sized Right

    The leash is the urethane cord that attaches your ankle to the tail of the board. It is your lifeline,it stops your board from becoming a dangerous projectile and saves you from swimming a mile to the shore after every wipeout.

    A good rule of thumb is to buy a leash that is roughly the same length as your board (e.g., an 8-foot leash for an 8-foot board). I learned this the hard way. I once bought an exaggeratedly long leash thinking it would give me more freedom. Instead, it just tangled around my legs constantly, making my pop-ups impossible and causing me to trip over myself underwater. Keep it simple and sized correctly.

    Protecting Your Skin: The Hard Lessons

    The ocean is an abrasive environment. Between the saltwater, the sun, and the board itself, your skin takes a beating.

    Wetsuits and Rash Guards

    The first time I paddled out under a strong sun without a proper rash guard or wetsuit, I ended up completely peeled. I hadn’t realized how much constant friction there is between your stomach, your legs, and the wax on the board.

    That severe “surf rash” and the sunburns taught me a harsh lesson: **surf clothing is armor.**

    Warm Water: You need a high-quality rash guard (Lycra). It prevents the wax from tearing up your chest and provides crucial UV protection. Pair it with boardshorts that fit securely.

    Cold Water: You need a wetsuit. A 3/2mm thickness is standard for mild climates, but if the water drops below 60°F (15°C), you’ll want a 4/3mm suit and possibly booties. The right wetsuit keeps you warm, which keeps your muscles loose and extends your session.

    Surf Wax and Sunscreen: Small Details, Big Impact

    Surf Wax: You need traction to stop slipping off the board. It seems like a minor detail, but using the wrong wax can ruin a session. Make sure you buy wax rated for the water temperature you are surfing in (Cold, Cool, Warm, or Tropical). If you use Tropical wax in cold water, it becomes as hard as a rock; if you use Cold wax in the tropics, it melts into a slippery mess.

    Sunscreen: The water reflects UV rays, doubling your exposure. Use a heavy-duty, water-resistant, zinc-based sunscreen on your face, neck, and the backs of your hands.

    What Beginners DON’T Need

    When you are struggling to catch waves, it is tempting to look for shortcuts. The internet is full of “inventions” that promise to make surfing easier. Save your money.

    I remember buying some sort of inflatable floatation device that claimed it would help me catch waves faster. It was a complete disaster. It was bulky, it got in the way of my paddling, and it just made maneuvering the board incredibly awkward.

    Avoid webbed paddling gloves, “shark deterrent” bracelets (unless you are in a highly specific, high-risk area), or any gadget that promises to replace good technique. What truly matters is mastering the basics: a board suited to your level, a reliable leash, a comfortable wetsuit, and sun protection.

    Ready with Your Gear? What to Do Next

    Getting the right equipment is step one. But having a board and a wetsuit doesn’t teach you how to read the ocean or how to stand up without face-planting.

    Now that you know what you need to start surfing, it is time to learn *how* to use it. You need to understand where to paddle, how to execute a proper pop-up, and the unwritten rules of the lineup so you stay safe.

    To master those crucial next steps, head over to our Ultimate Guide to Surfing for Beginners: How to Start and Not Give Up. It covers everything from paddling techniques to surviving your first wipeout.

    Grab your gear, respect the ocean, and we’ll see you in the water.

    Frequently Asked Questions (FAQ) About Beginner Surf Gear

    Can I learn to surf on a hard fiberglass board?

    Technically, yes, but it is highly discouraged. Fiberglass boards are less buoyant, making them much harder to paddle and balance on. They are also dangerous for beginners; getting hit by a hard rail or the sharp nose of a fiberglass board can cause serious injury. Always start with a foam board (softboard).

    Do I need to buy my own gear right away?

    No. In fact, renting is the best option for your first few sessions. Renting allows you to try different sizes of foam boards and ensures you actually enjoy the sport before committing hundreds of dollars to a wetsuit and a board. Once you are consistently catching waves, then it’s time to invest in your own gear.

    How do I transport a surfboard if I don’t have roof racks?

    If your car is large enough (like an SUV or hatchback), you can often slide the board inside by folding down the passenger seats. If it must go on the roof and you don’t have hard racks, you can buy “soft racks”,removable pads that strap through the doors of your car. Never drive with a board just tied directly to the metal roof; you will damage both the car and the board.

  • The Ultimate Guide to Surfing for Beginners: How to Start and Not Give Up

    The Ultimate Guide to Surfing for Beginners: How to Start and Not Give Up

    Let’s be honest: watching a pro surfer carve a wave makes it look effortless. They glide, they turn, they make the ocean look like a playground. But when you grab a board for the first time, the reality hits you like a ton of saltwater. You quickly realize that surfing is one of the most physically and mentally demanding sports on the planet.

    But here is the secret: it is also the most rewarding. Beyond the physical challenge, the Benefits of Surfing for Body and Mind are life-changing, offering a rare mental reset that few other sports can match. This isn’t just another generic list of tips. This is the ultimate guide to surfing for beginners, designed to save you from the common mistakes, the exhaustion, and the frustration that make so many people quit before they even start. We are going to cover everything from choosing the right gear to understanding the ocean, because catching a wave is only 10% of the battle.

    What You Need Before Touching the Water (Essential Gear)

    Before you can think about riding a wave, you need the right tools. If you want a deep dive into the specifics, check out our Essential Beginner Gear Guide. The surf industry will try to sell you everything under the sun, but as a beginner, keep it simple.

    The Board: Choose Stability Over Ego

    When I first started, I wanted the coolest, sharpest shortboard I could find. Huge mistake. If I could summarize everything I’ve learned in these years, I’d tell you to start with a stable, thick board, even if it’s not the most attractive one on the beach. Falling into the “cool board” trap is one of the most common surfing mistakes beginners make that stalls their progress for months.
    For your first few months, a foam board (softboard) between 8 and 9 feet is your best friend. Why?


    Buoyancy: They float easily, making paddling less exhausting.

    Stability: A wider deck gives you a massive margin of error when trying to stand up.

    Safety: When (not if) the board hits you in the head, foam hurts a lot less than fiberglass.

    Forget about doing radical maneuvers right now. Swallow your ego. The goal is to catch as many waves as possible and stand up. You can’t do that if you are sinking on a tiny board.

    Before you can think about riding a wave, you need the right tools (The Leash, the Wax, and the Wetsuit)

    The Leash, the Wax, and the Wetsuit

    The Leash: This is your lifeline. It attaches your ankle to the tail of the board. Without it, your board becomes a dangerous projectile, and you’ll spend 90% of your session swimming after it.

    Surf Wax: You need traction. Apply a generous base coat and then a top coat suited for the water temperature you are surfing in.

    The Wetsuit: Unless you are in tropical waters, you’ll need neoprene. Choosing what to wear surfing in different water temperatures is vital; if you are too cold or too hot, your session will end early.

    Understanding the Ocean: The Most Ignored Step by Beginners

    Most beginners grab their board, run into the water, and start paddling like their life depends on it. I know, because I did exactly that. What I struggled with the most at the beginning wasn’t actually standing on the board; it was understanding the water.
    Learning how to read waves for beginners is a superpower. I used to exhaust myself paddling after every single bump on the horizon and always arrive late. Over time, I learned a crucial lesson: it’s not about paddling harder; it’s about being in the right place.

    Before you even put your leash on, stand on the beach for 10 minutes and observe:

    1. Where are the waves breaking? Look for the “peak” (the highest point of the wave before it crashes).
    2. Are there rip currents? Look for darker, calmer, or churning water moving away from the shore. Use these channels to paddle out without fighting the whitewater.
    3. What are the other surfers doing? Notice where the experienced guys are sitting. Don’t paddle directly into their zone, but use them as a reference point for where the waves are forming.

    Learning to observe before entering the water will completely change your approach to surfing.

    Most beginners grab their board, run into the water, and start paddling like their life depends on it. I know, because I did exactly that. What I struggled with the most at the beginning wasn’t actually standing on the board; it was understanding the water.

    Step-by-Step Technique: From Paddling to Your First Ride

    You have the gear. You’ve watched the ocean. Now it’s time to get wet.

    Positioning and Efficient Paddling

    Your positioning on the board dictates everything. If you are too far forward, the nose will dig into the water (pearling). If you are too far back, the tail drags, and you’ll never catch the wave. Find the “sweet spot” where the board is perfectly flat on the water while you arch your back and keep your chest up.
    When paddling, use long, deep strokes reaching down into the water, rather than short, frantic splashes. Cup your hands slightly and pull the water past your hips.

    The Pop-Up: The Art of Standing Up

    The “pop-up” is an explosive push-up that transitions you from your stomach to your feet in one fluid motion.

    This is the foundation of your ride. To master this, follow our detailed guide on how to stand up on a surfboard step-by-step, and practice the movement on land until it becomes muscle memory.

    Practice this on land. A lot.

    1. Place your hands flat on the deck, near your lower ribs (not holding the rails).
    2. Push up explosively.
    3. Swing your legs under you, bringing your front foot between your hands and your back foot near the tail.
    4. Stay low, knees bent, arms out for balance, and look straight ahead, never look down at your feet.

    That First Glide

    When you are ready, start in the whitewater (the broken, foamy part of the wave). Paddle towards the shore, feel the momentum of the water pick you up, and execute your pop-up.
    Nothing compares to that first wave where you actually manage to stand up. I remember mine clearly. It was a small wave, nothing impressive from the outside, but when I did the pop-up and felt the board gliding, the world went completely silent. All I could hear was the water rushing under my feet. It lasted only a few seconds, but it was enough to understand why people fall in love with this. It wasn’t about speed; it was the profound sensation of being connected to something much bigger than yourself. When you get that feeling, there is no turning back.

    Nothing compares to that first wave where you actually manage to stand up. I remember mine clearly. It was a small wave, nothing impressive from the outside, but when I did the pop-up and felt the board gliding, the world went completely silent.

    Surviving the Wipeouts: Fear, Safety, and Respect

    Surfing is dealing with an uncontrollable force of nature. You will fall, and you will get held underwater. This is why following surf safety tips for first-time surfers is non-negotiable.

    When the Ocean Puts You in Your Place

    I learned this the hard way. I once paddled out in waves that were too big for my level and got destroyed by a set. That day taught me that the ocean always demands respect. Underestimating the power of even a small wave is a mistake you only make once.
    When you wipe out, cover your head with your arms and stay calm. The ocean is not against you; it is simply powerful. Learn to hold your breath, relax, and let the wave pass. You will pop back up to the surface in a few seconds.

    Managing Fear and Breath

    If someone tells me they are afraid of the ocean, I completely understand. Fear is natural and necessary because it keeps you alert. The important thing is not letting it paralyze you.
    Start on beaches with sandy bottoms and small waves. Go with someone experienced, and focus on feeling comfortable in the water without the pressure of surfing perfectly. A huge part of the fear comes from losing control of your breathing when a wave tumbles you.
    When you wipe out, cover your head with your arms. Don’t fight the turbulence. The ocean is not against you; it is simply powerful and indifferent. When you accept that, you stop fighting it and start flowing. Learn to hold your breath, stay calm, and let the wave pass. You will pop back up to the surface in a few seconds.

    Lineup Etiquette: The Unwritten Rules

    The ocean is for everyone, but the waves have a hierarchy. To avoid dangerous collisions and keep the peace, you must follow surf etiquette and the rules every surfer must know.
    Don’t Drop In: The surfer closest to the peak (where the wave is breaking) has the right of way. If someone is already riding the wave, pull back.

    Don’t Snake: Don’t paddle around someone to get closer to the peak and steal their right of way. Wait your turn.

    Hold Onto Your Board: Never throw your board when a wall of whitewater is coming. Learn the turtle roll (for longboards/foamies) to keep control of your gear and protect others.

    Apologize: If you make a mistake and get in someone’s way, a simple “I’m sorry, my bad” goes a long way.

    The ocean is for everyone, but the waves have a hierarchy. To avoid dangerous collisions and keep the peace

    The Journey is Slow, but Worth It

    The journey of a surfer is personal and notoriously slow. You might find yourself asking, “is surfing hard to learn?” The answer is yes, but the challenge is part of the reward.
    How long the process takes depends on your consistency. If you’re wondering “how long does it take to learn surfing?” the reality is that while you can stand up in a few days, mastering the ocean takes a lifetime. Focus on the small wins, enjoy the horizon, and keep paddling.


    Frequently Asked Questions (FAQ) for Beginner Surfers

    Where are the best places for beginners to start?

    You want a beach with a sandy bottom and gentle, rolling waves. Check out our list of the best beaches for beginner surfers to find a spot that matches your current skill level.

    How long does it actually take to learn how to surf?

    It depends entirely on your consistency, fitness level, and the conditions you surf in. If you practice consistently (2-3 times a week), you can learn to pop up and ride whitewaters comfortably in a few weeks. However, catching unbroken “green” waves consistently and learning basic turns usually takes anywhere from six months to a year. Remember, surfing has one of the steepest learning curves of any sport.

    What is the difference between a “duck dive” and a “turtle roll”?

    Both are techniques used to get past breaking waves while paddling out, but they are used for different boards:

    Turtle Roll: Used with longboards and thick foam boards (softboards) that are too buoyant to sink. You grab the rails (edges), flip the board upside down so you are underwater and the board is on top, and hold on tight while the wave washes over the hull.

    Duck Dive: Used with shortboards (typically under 7 feet). You push the nose of the board deep underwater and use your knee or foot on the tail to sink the rest of the board, allowing the wave’s energy to pass over you.

    Why do I keep “pearling” (nose-diving) when trying to catch a wave?

    Pearling happens when the nose of your surfboard digs into the water, usually sending you flying over the handlebars. This is caused by three main beginner mistakes:

    • Poor Positioning: You are lying too far forward on the board.
    • Paddling Too Slow: If you don’t match the speed of the wave, the wave will pick up the tail of your board and push the nose down.
    • Late Takeoff: Trying to catch the wave when it is already too steep. You need to catch it earlier in its formation.
    Do I really need to take surf lessons, or can I teach myself?

    While it is possible to teach yourself, taking at least one or two professional lessons is highly recommended. An instructor will correct dangerous habits (like placing your hands on the rails during a pop-up), teach you crucial ocean safety (identifying rip currents), and help you choose the right initial equipment. Self-teaching often leads to a slower progression and a higher risk of injury or frustrating wipeouts.

  • Work, Surf, Repeat: Top 5 Destinations for Remote Workers in Europe (2026)

    Work, Surf, Repeat: Top 5 Destinations for Remote Workers in Europe (2026)

    It’s 10:55 AM. You are on a Zoom call with the marketing team in London. You are nodding politely, but under the desk, your legs are restless. Why? Because you checked the cam at Ribeira d’Ilhas, and the wind just switched offshore.

    This is the reality of the Digital Nomad Surf lifestyle in 2026, It’s not just Instagram photos of laptops on hammocks (bad for your back, worse for your productivity… It’s a tactical balancing act, It’s knowing exactly which café in Las Palmas has fiber optic speed strong enough to upload a 4GB video file, and which beaches in Portugal have lockers so you don’t have to leave your MacBook hidden under a towel.

    I’ve spent the last three years trading office fluorescents for Atlantic sunsets. We are looking for the Holy Trinity of the surfing nomad: Consistent Waves + High-Speed WiFi + Walkability.

    So, close your slack notifications for a minute. Here are the spots where you can actually get work done, and get barreled, in the same afternoon.

    Vibe: Silicon Valley meets Saltwater.

    Ericeira, Portugal: The European Mecca

    Ericeira isn’t a secret anymore, but it holds the crown for a reason. As Europe’s only World Surfing Reserve, the wave density is insane. In 2026, the community is fully established, making it the easiest place to network.

    Best Season: Year-round (Best waves: Sept-May).

    WiFi Speed: Average 500 Mbps (Fiber everywhere).

    Top Coworking: Kelp Cowork, Salt Studio.

    Cost of Living: High (Similar to Lisbon).

    Urban surf jungle

    Las Palmas de Gran Canaria, Spain: The Winter Escape

    When the rest of Europe is freezing in January, Las Palmas is 22°C. “La Cicer” (the main surf beach) is literally in the city center. You can finish a meeting at a café on the promenade and be in the water in 5 minutes.

    Best Season: October to March (Winter Gold).

    WiFi Speed: 600 Mbps – 1 Gbps.

    Top Coworking: Talleres Palermo, Soppa de Azul.

    Cost of Living: Medium (Tax benefits for nomads).

    Classy and energetic

    San Sebastián (Donostia), Spain: Surf & Gastronomy

    If you have a higher budget and appreciate the finer things, San Sebastián is the place. You surf at Zurriola Beach (right in the hip Gros neighborhood) and then eat the best pintxos of your life.

    Best Season: Autumn and Spring.

    WiFi Speed: 600 Mbps.

    Top Coworking: Impact Hub Donostia, Kowork.

    Cost of Living: Very High (Especially accommodation).

    Wild West / Nature focused

    Sagres, Portugal: The End of the World

    If you need to finish a big project and want zero distractions, go to Sagres, located at the tip of the Algarve, it catches swell from two directions (South and West). It’s rugged, windy, and beautiful.

    Best Season: Winter (for big swells) & Spring.

    WiFi Speed: 200 Mbps (Decent, but verify your Airbnb first).

    Top Coworking: The Hangout (Café style), Cowork Sagres.

    Cost of Living: Medium-Low.

    High-performance industry.

    Hossegor, France: The Autumn Choice

    Warning: Do not go in January unless you like solitude and storms. Hossegor shines in September and October, the summer crowds leave, the water is still warm, and the legendary sandbanks turn on.

    Best Season: September – October.

    WiFi Speed: 400 Mbps.

    Top Coworking: Jo&Joe (Open space), L’Office.

    Cost of Living: High.


    The Nomad Gear Check: Protect Your Tech

    Living this lifestyle means your expensive laptop is constantly exposed to its worst enemies: sand, salt, and humidity. You don’t need a lot of stuff, but you need the right stuff. Here is what I never travel without:

    1. The “Dry” Backpack: A waterproof roll-top bag is essential. If you are biking from the coworking space to the beach, sudden rain or a wet wetsuit in the trunk can ruin your electronics.
    2. Noise-Canceling Headphones: Essential for focus in busy cafes.
    3. A Changing Robe: When you have a meeting in 20 minutes, you can’t struggle with a towel. A good poncho gets you dry and dressed in seconds

    Looking for durable gear that survives the nomad life? We are curating a selection of surf-ready accessories. Stay tuned.
  • Winter Surfing in Europe: The Ultimate Gear & Wetsuit Guide (2026 Edition)

    Winter Surfing in Europe: The Ultimate Gear & Wetsuit Guide (2026 Edition)

    Let’s be honest for a second. Waking up at 7:00 AM in January, when the streets are frozen and it’s still pitch black outside, feels unnatural. Your brain screams “stay in bed.” I’ve been ther, sitting in my van in a parking lot in Hossegor, watching the steam rise from my coffee, dreading the moment I have to take off my warm hoodie

    But then you see it. clean lines, offshore wind. And the most important part? Empty peaks.

    That’s the secret we keep at OceanRoad..winter surfing in Europe isn’t a punishment; it’s the prize, but only if you have the right armor. I remember my first winter trip to Peniche years ago…I tried to brave the atlantic in an old, crusty 3/2mm wetsuit, I lasted 20 minutes my feet went numb, my duck dives felt like brain freezes, and I missed the best session of the trip because I couldn’t stop shivering.

    That day I learned the golden rule, there is no such thing as bad weather, only bad gear.

    In 2026, technology has changed the game, we aren’t surfing in stiff rubber anymore, we have materials that stretch like a second skin and linings that feel like wearing a wool sweater underwater. So, grab a coffee, and let’s break down exactly what you need to pack so the only thing you feel is the stoke, not the freeze.

    The Big Debate: 4/3mm vs. 5/4mm Wetsuits

    This is the most common question we get: “Do I really need a 5/4, or can I get away with a 4/3?” The answer depends entirely on your latitude and your tolerance to the wind chill factor.

    Here is our definitive cheat sheet for the European coast (Jan-Feb):

    RegionWater Temp (Avg)Recommended WetsuitAccessories Needed
    South Portugal (Algarve) / South Spain15-16°C (59-61°F)4/3mm3mm Booties (Optional but recommended)
    Central Portugal (Ericeira) / North Spain13-14°C (55-57°F)5/4mm5mm Booties + Hood (Wind days)
    France (Landes) / UK / Ireland8-11°C (46-52°F)5/4mm or 6/5mmHood + 5mm Gloves + 7mm Boots

    Planning a longer trip? Check out our guide on The Best Digital Nomad Spots in Europe to see which towns have the mildest winters.

    Wetsuit Tech 2026: What to Look For Before Buying

    Not all millimeters are created equal… A cheap 5mm suit will feel colder than a premium 4mm suit, when shopping for the best winter wetsuits in 2026, look for these three features

    Sustainable Rubber (Yulex & Beyond)

    Sustainability is no longer optional; it’s the standard, traditional petroleum-based neoprene is fading out.

    • Yulex Natural Rubber: Derived from plants. In 2026, Yulex is just as flexible as standard neoprene while big brands popularized it, many European indie brands (from the UK, Netherlands, and France) are now producing incredible eco-friendly suits that rival the giants in quality and price. Support local, surf global.

    Thermal Lining (The Furnace Effect)

    Turn the suit inside out. Do you see a fluffy, fleece-like material? That is the thermal lining, It traps a layer of air against your skin, which your body heats up. Look for suits that have this lining all the way down to the knees, not just on the chest panel.

    The Game Changer: Battery Heated Vests

    If you really suffer from the cold, 2026 has brought battery tech to the mainstream. Heated vests worn under your wetsuit are now thinner, safer, and more affordable. they keep your core temperature up for 2+ hour sessions in the North Sea. It’s not cheating; it’s evolution.

    The Extremities: Booties, Hoods, and “Lobster Claws”

    Your core might be warm, but if you can’t feel your feet, you can’t surf. Here is the cold water surf gear checklist for your extremities:

    • Surf Booties: For Europe, 3mm is okay for the south, but 5mm booties are the standard for the Atlantic coast, look for “split toe” designs… They prevent your foot from sliding around inside the boot when you turn.
    • The “Lobster Claw” Glove: This hybrid design (three fingers together, index separate) gives you the warmth of a mitten with the grip of a glove. They are essential for winter surfing in France or the UK.
    • Hoods: Surfer’s Ear (exostosis) is real and caused by cold wind and water, even if you don’t like wearing a hood, keep a hooded vest in your bag for those windy days.

    The Pre & Post-Surf Ritual

    Surviving the cold isn’t just about what happens in the water, the most dangerous part is often the parking lot.

    1. The Changing Poncho: Essential. Get a thick, terry-cloth poncho, It blocks the wind while you change.
    2. Hot Water Jug: Fill a large jug with hot tap water before you leave the house. Pouring warm water over yourself after a freezing session is the best feeling in the world.
    3. Winter Wax: Don’t forget to scrape off your tropical wax. You need “Cold” or “Cool” water wax; otherwise, your board will be slippery like a bar of soap.

    Embrace the Elements

    Winter surfing in Europe tests your commitment, but it rewards you with empty lineups and the best waves of the year, with the right winter surf gear, the cold becomes just another element to manage, not a barrier.